django-allauth 是非常受欢迎的管理用户登录与注册的第三方 Django 安装包,django-allauth 集成了 local 用户系统 和 social 用户系统,其 social 用户系统 可以挂载多个账户。
django-allauth 能实现以下核心功能:
安装与配置
安装 django-allauth
allenlideMacBook-Pro:~ allen$ mkvirtualenv oauth
(oauth) allenlideMacBook-Pro:~ allen$ pip install django
(oauth) allenlideMacBook-Pro:~ allen$ pip install django-allauth
创建 Django 项目
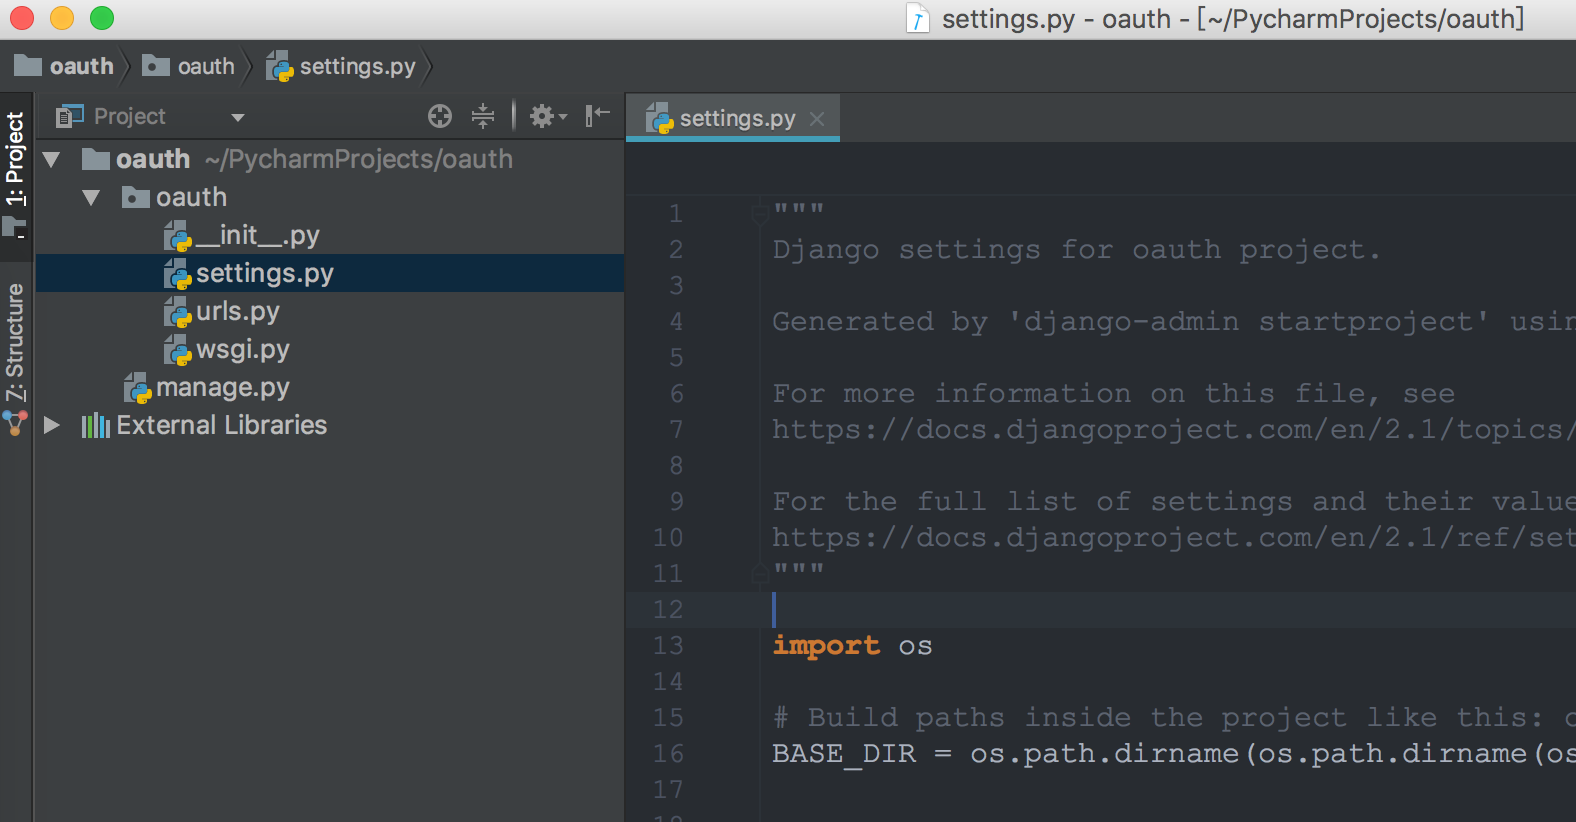
项目基础配置
安装好后设置 oauth/settings.py,将allauth相关APP加入到INSTALLED_APP里去。对于第三方的providers,你希望用谁就把它加进去。值得注意的是allauth对于站点设置django.contrib.sites有依赖,你必需也把它加入进去,同时设置SITE_ID。
INSTALLED_APPS = [
    ...,
    # django-allauth 需要注册的 app
    'django.contrib.sites',
    'allauth',
    'allauth.account',
    'allauth.socialaccount',
    'allauth.socialaccount.providers.weibo',
    'allauth.socialaccount.providers.github',
]

# 当出现 "SocialApp matching query does not exist" 这种报错的时候就需要更换这个ID
SITE_ID = 1
设置 BACKENDS 并提供用户登录验证的方法和用户登录后跳转的链接
# allauth 设置 BACKENDS
AUTHENTICATION_BACKENDS = (
    'django.contrib.auth.backends.ModelBackend',
    'allauth.account.auth_backends.AuthenticationBackend',
)

# 设置登录和注册成功后重定向的页面,默认是 "/accounts/profile/"
LOGIN_REDIRECT_URL = "/accounts/profile/"
配置 django-allauth 其它选项
ACCOUNT_EMAIL_VERIFICATION = 'mandatory' # 强制注册邮箱验证(注册成功后,会发送一封验证邮件,用户必须验证邮箱后,才能登陆)
ACCOUNT_AUTHENTICATION_METHOD = "username_email"     # 登录方式(选择用户名或者邮箱都能登录)
ACCOUNT_EMAIL_REQUIRED = True           # 设置用户注册的时候必须填写邮箱地址
ACCOUNT_LOGOUT_ON_GET = False           # 用户登出(需要确认)
配置邮箱
EMAIL_HOST = "smtp.sina.com"
EMAIL_PORT = 25
EMAIL_HOST_USER = "opcoder@sina.com"
EMAIL_HOST_PASSWORD = "password"        # 这个不是邮箱密码,而是授权码
EMAIL_USE_TLS = True                    # 这里必须是 True,否则发送不成功
EMAIL_FROM = "opcoder@sina.com"         # 发件人
DEFAULT_FROM_EMAIL = "OPCoder 博客 <opcoder@sina.com>" # 默认发件人(如果不添加DEFAULT_FROM_EMAIL字段可能会导致如下错误: 451, b'Sender address format error.', 'webmaster@localhost')
修改时区
LANGUAGE_CODE = 'zh-hans'

TIME_ZONE = 'Asia/Shanghai'

USE_I18N = True

USE_L10N = True

USE_TZ = False
将 allauth 添加加到项目的 urls.py 中
from django.conf.urls import url, include

urlpatterns = [
    ...,
    url(r'^accounts/', include('allauth.urls')),
]
django-allauth 常见设置选项
- ACCOUNT_AUTHENTICATION_METHOD (="username" | "email" | "username_email")
指定要使用的登录方法(用户名、电子邮件地址或两者之一)
- ACCOUNT_EMAIL_CONFIRMATION_EXPIRE_DAYS (=3)
邮箱确认邮件的截止日期(天数)
- ACCOUNT_EMAIL_VERIFICATION (="optional")
注册中邮件验证方法: "强制(mandatory)"、 "可选(optional)" 或 "否(none)" 之一
- ACCOUNT_EMAIL_CONFIRMATION_COOLDOWN (=180)
邮件发送后的冷却时间(以秒为单位)
- ACCOUNT_LOGIN_ATTEMPTS_LIMIT (=5)
登录尝试失败的次数
- ACCOUNT_LOGIN_ATTEMPTS_TIMEOUT (=300)
从上次失败的登录尝试,用户被禁止尝试登录的持续时间
- ACCOUNT_LOGIN_ON_EMAIL_CONFIRMATION (=False)
更改为True,用户一旦确认他们的电子邮件地址,就会自动登录
- ACCOUNT_LOGOUT_ON_PASSWORD_CHANGE (=False)
更改或设置密码后是否自动退出
- ACCOUNT_LOGIN_ON_PASSWORD_RESET (=False)
更改为True,用户将在重置密码后自动登录
- ACCOUNT_SESSION_REMEMBER (=None)
控制会话的生命周期,可选项还有: "False" 和 "True"
- ACCOUNT_SIGNUP_EMAIL_ENTER_TWICE (=False)
用户注册时是否需要输入邮箱两遍
- ACCOUNT_SIGNUP_PASSWORD_ENTER_TWICE (=True)
用户注册时是否需要用户输入两遍密码
- ACCOUNT_USERNAME_BLACKLIST (=[])
用户不能使用的用户名列表
- ACCOUNT_UNIQUE_EMAIL (=True)
加强电子邮件地址的唯一性
- ACCOUNT_USERNAME_MIN_LENGTH (=1)
用户名允许的最小长度的整数
- SOCIALACCOUNT_AUTO_SIGNUP (=True)
使用从社交账号提供者检索的字段(如用户名、邮件)来绕过注册表单
- LOGIN_REDIRECT_URL (="/")
设置登录后跳转链接
- ACCOUNT_LOGOUT_REDIRECT_URL (="/")
设置退出登录后跳转链接
- ACCOUNT_LOGOUT_ON_GET (=True) 用户登出是否需要确认确认(True表示直接退出,不用确认;False表示需要确认)
生成数据库
python manage.py makemigrations
python manage.py migrate
python manage.py runserver
页面访问
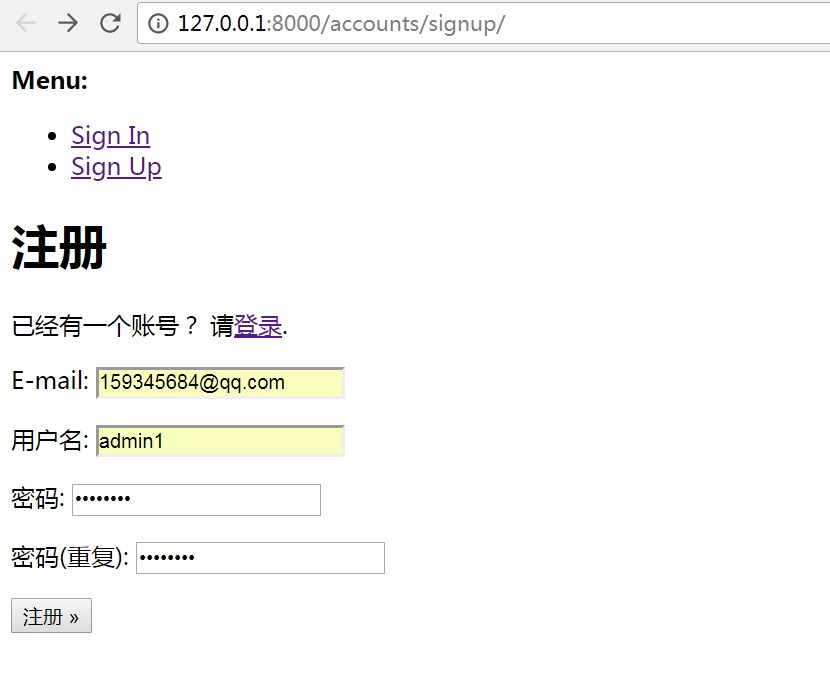
- 注册 http://127.0.0.1:8000/accounts/signup/
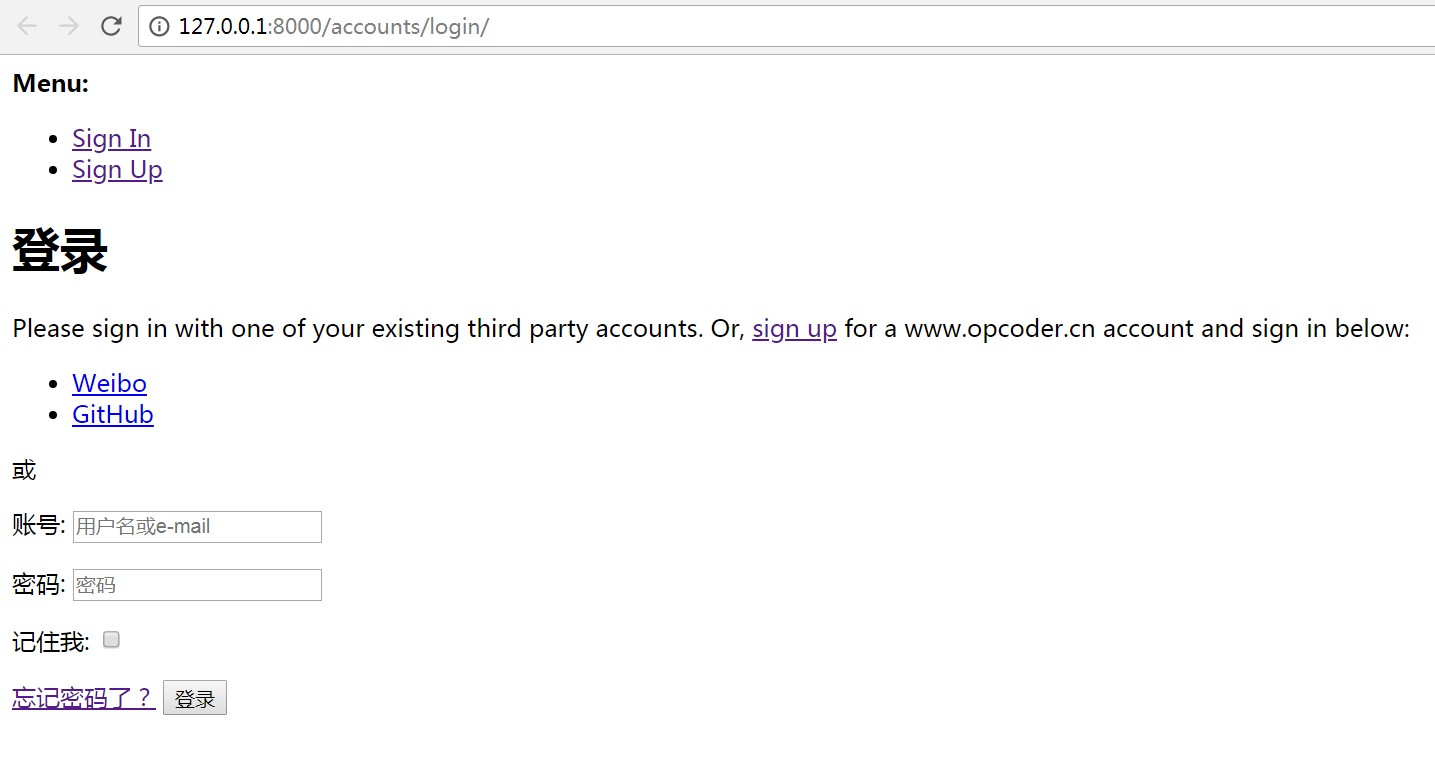
- 登录 http://127.0.0.1:8000/accounts/login/
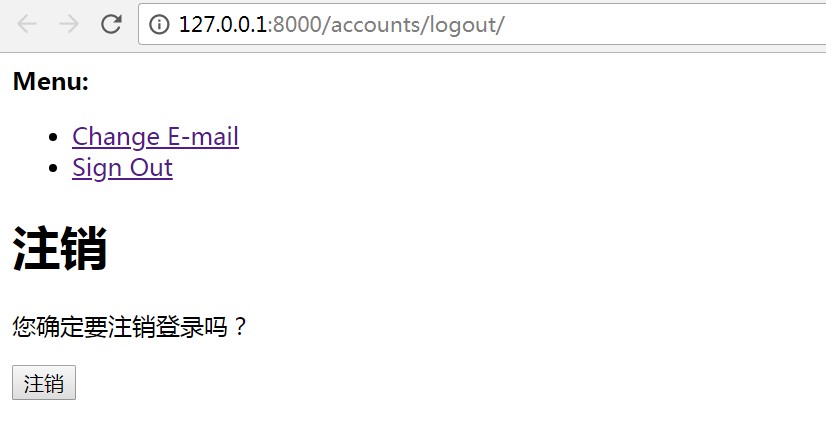
- 注销 http://127.0.0.1:8000/accounts/logout/
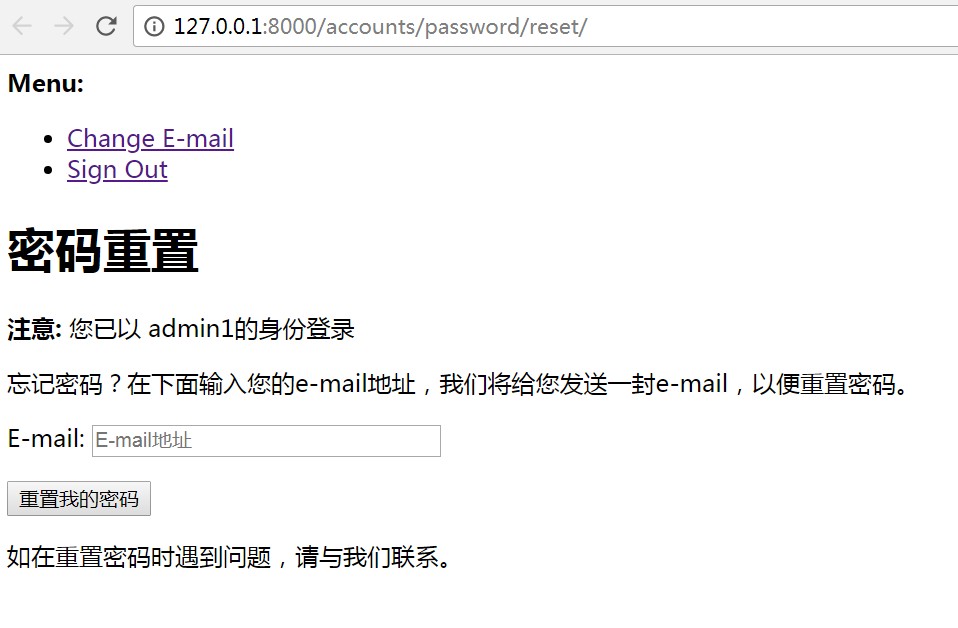
- 忘记密码 http://127.0.0.1:8000/accounts/password/reset/
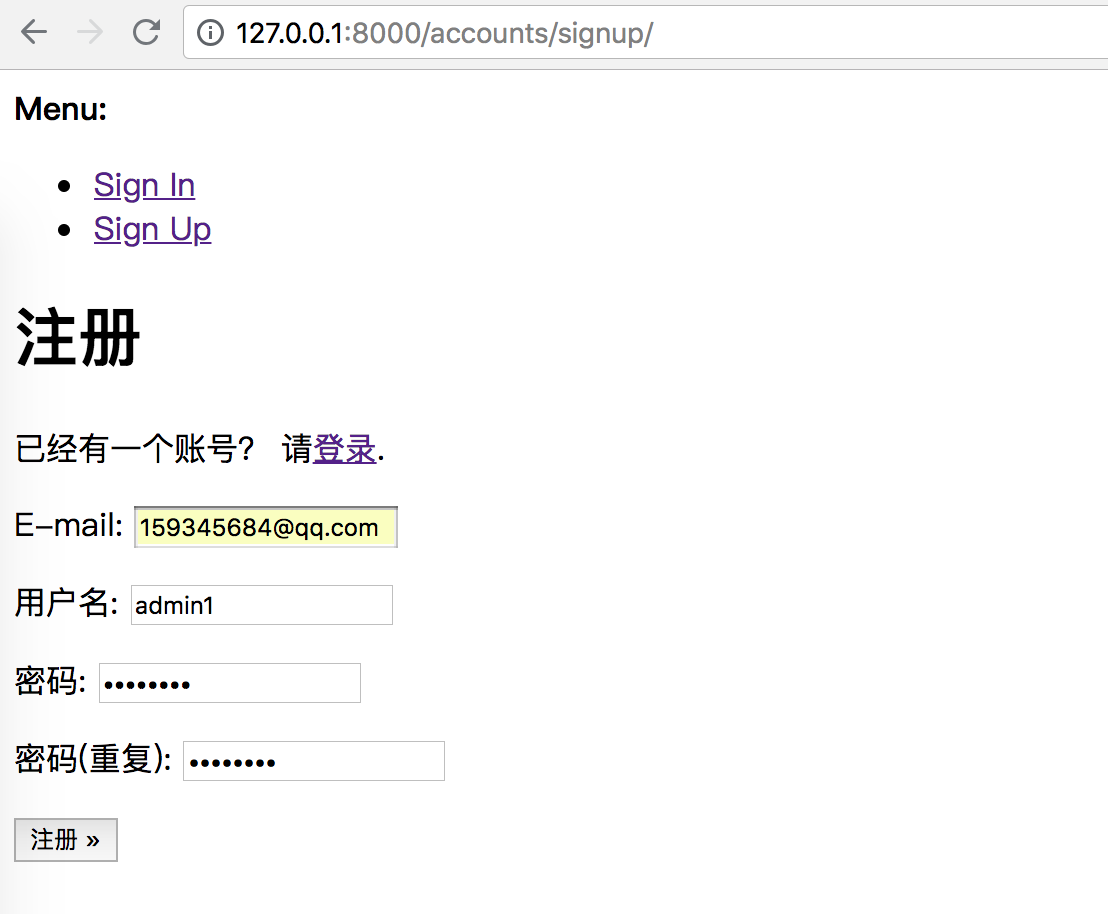
用户注册
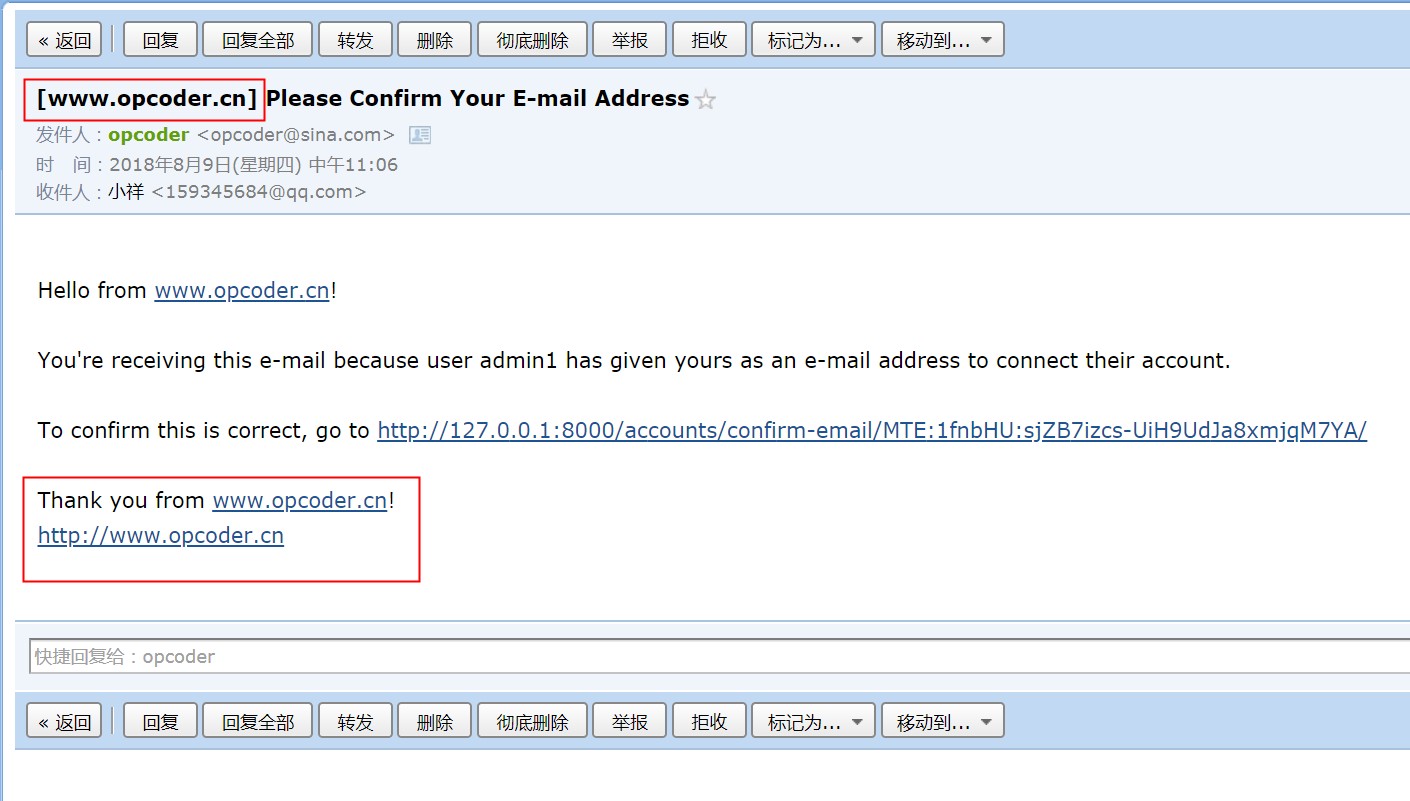
当注册成功后,用户会收到一封邮件来验证邮箱(使用邮箱强制验证),在你提交表单后,django-allauth会自动检测用户名和email是否已经存在。
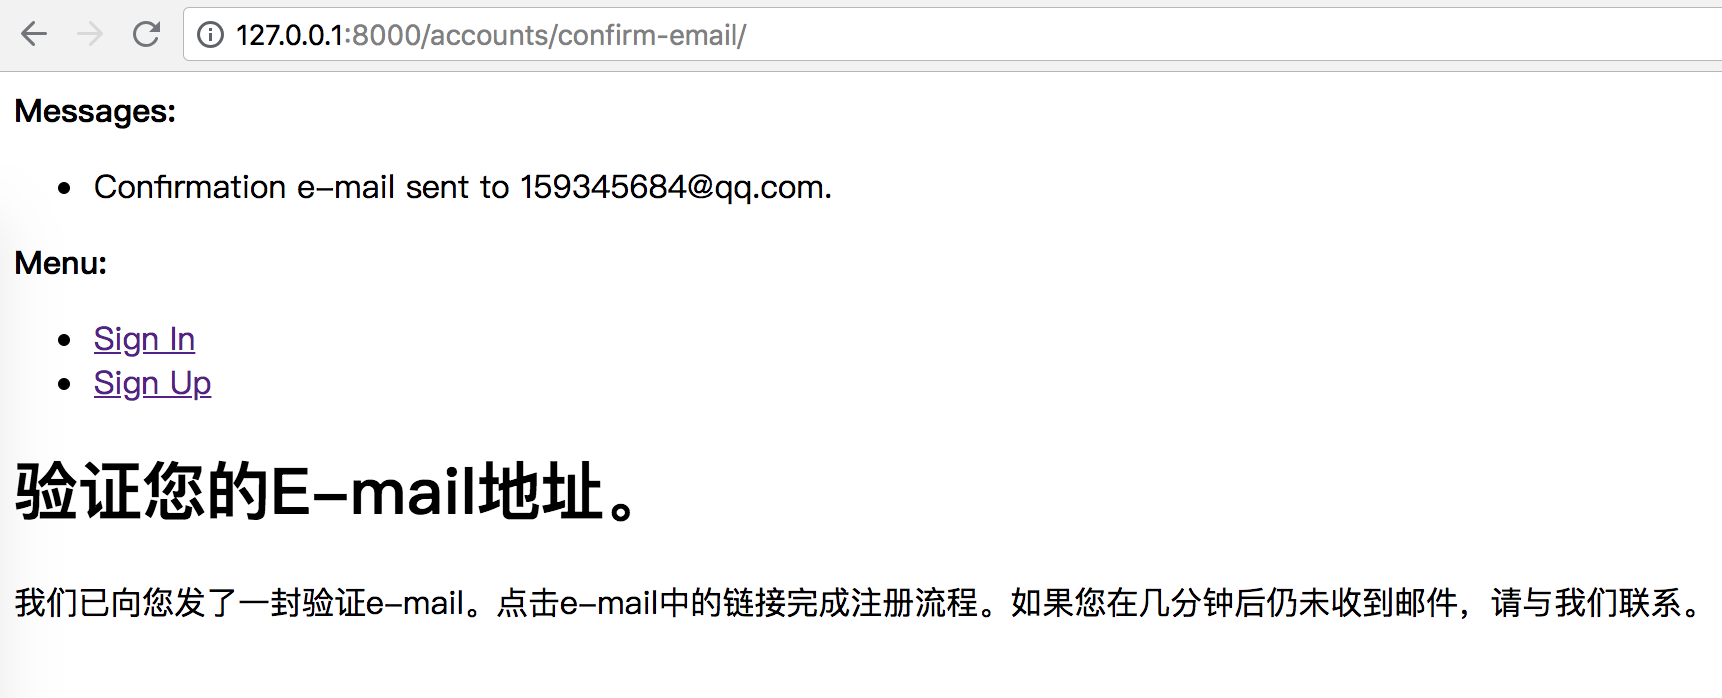
邮箱验证
点击邮件中的链接,点击"确认"就可以验证邮箱了。
如果你不需要邮箱验证,只需要设置 ACCOUNT_EMAIL_VERIFICATION = 'none' 就可以了。
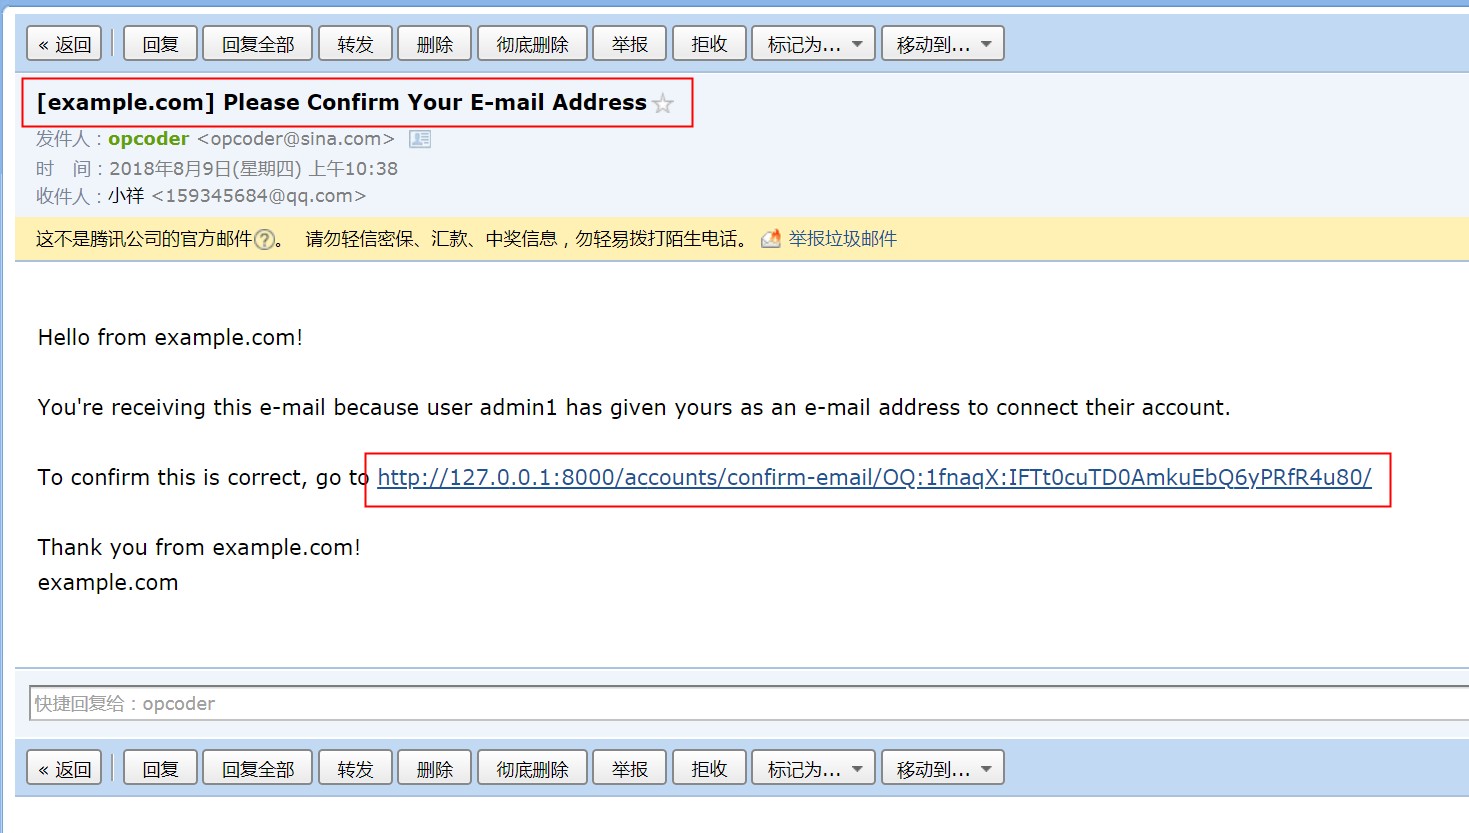

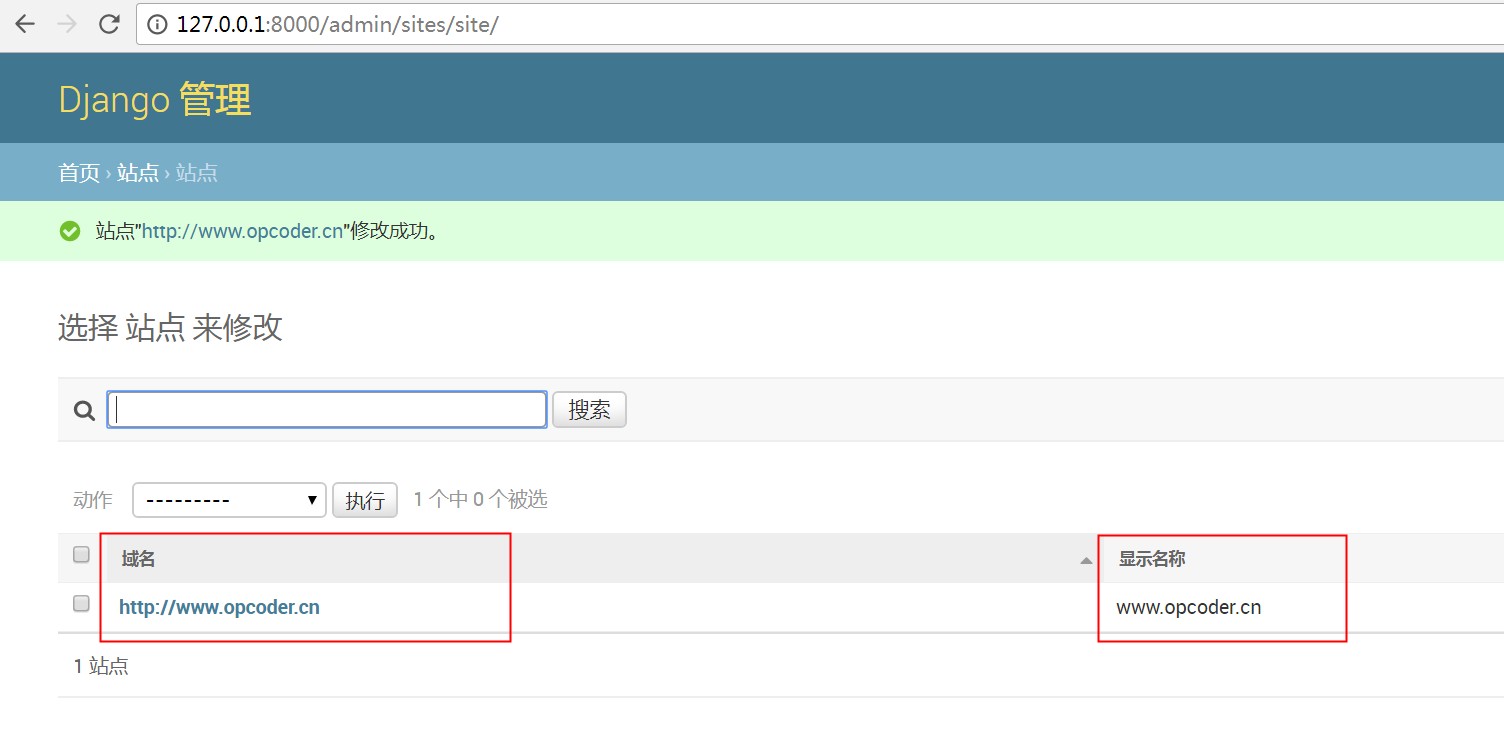
如果需要去掉邮件中的 "example.com",只需要在 admin后台 中改下 "显示名称" 就可以了。
# 创建超级用户,用于登陆后台页面
python manage.py createsuperuser
重新注册, 检查邮件内容是否已经变更
用户登录
用户登出
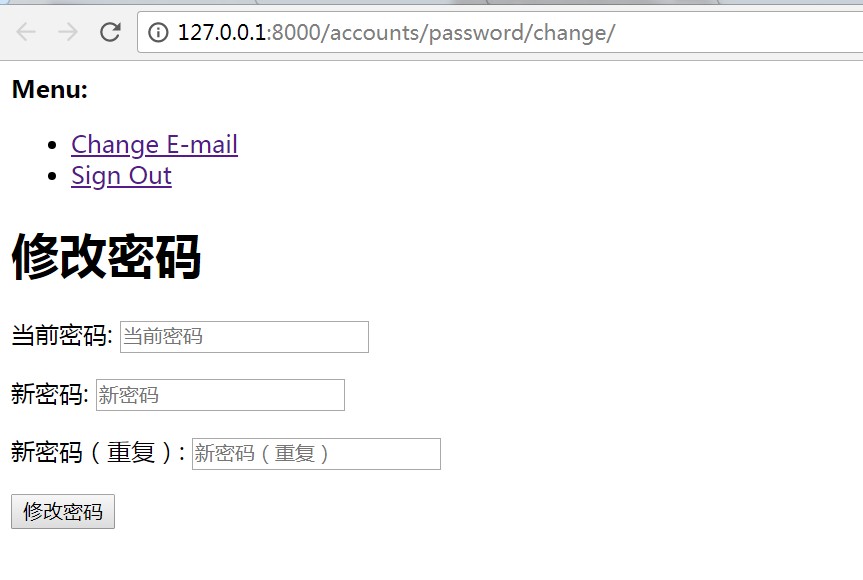
修改密码
重置密码
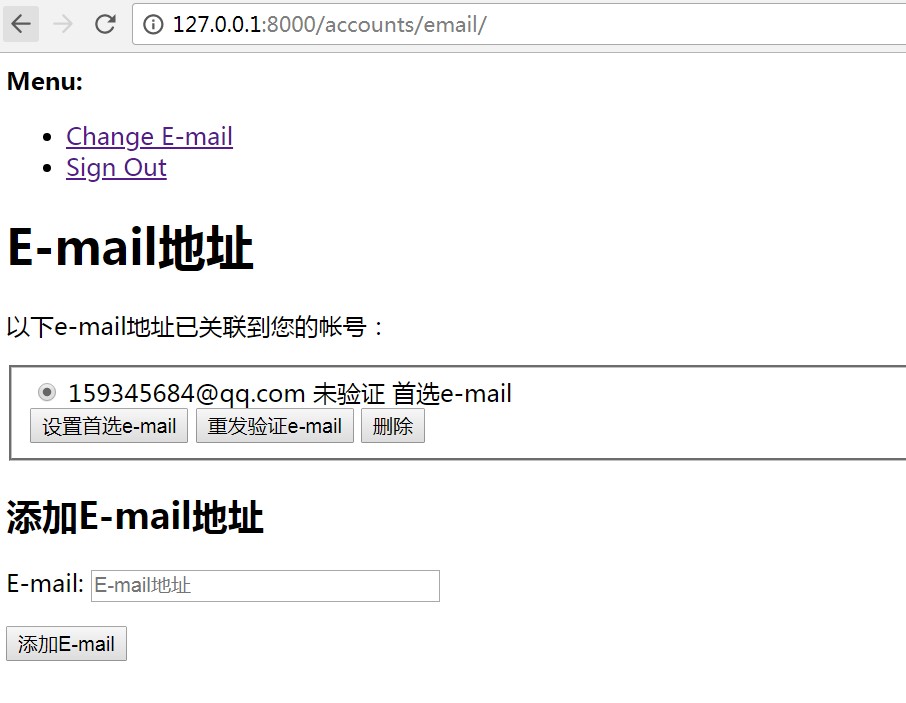
修改邮箱
django-allauth 内置的 URLs
- /accounts/signup [name='account_signup'] 注册
- /accounts/login [name='account_login'] 登录
- /accounts/logout [name='account_logout'] 登出
- /accounts/password/change/ [name='account_change_password'] 修改密码(需登录)
- /accounts/password/set/ [name='account_set_password'] 设置密码(用于邮件重置密码,不需要登录)
- /accounts/social/ 社交账号
扩展用户模型
django-allauth 并没有提供展示和修改用户资料的功能,也没有对用户资料进行扩展,所以我们需要自定义用户模型来进行扩展。
创建 app 及配置
由于 django-allauth 已经占用了 account 这个 app,所以我们需要创建一个名叫 users 的 app,并将其加入 settings.py 配置文件的 INSTALL_APPS 中,同时把url也加入到项目的 ROOT URLs 中。
python manage.py startapp users
# settings.py

INSTALLED_APPS = [
    ...,
    'users',
    # django-allauth 需要注册的 app
    'django.contrib.sites',
    'allauth',
    ...,
]
# urls.py

from django.conf.urls import url, include

urlpatterns = [
    ...,
    url(r'^accounts/', include('allauth.urls')),
    url(r'^accounts/', include('users.urls')),
]
因为我们希望用户在登录或注册成功后,自动跳转到 "/accounts/profile/",我们可以加入(修改)如下代码
# settings.py

LOGIN_REDIRECT_URL = "/accounts/profile/"
创建用户模型及表单
# users/models.py

from django.db import models
from django.contrib.auth.models import AbstractUser


class UserProfile(AbstractUser):
    GENDER_CHOICE = (
        ('male', '男'),
        ('female', '女')
    )
    nick_name = models.CharField(max_length=20, verbose_name='昵称', null=True, blank=True)
    mobile = models.CharField(max_length=11, verbose_name='手机', null=True, blank=True)
    address = models.CharField(max_length=200, verbose_name='地址', null=True, blank=True)

    class Meta:
        verbose_name = '用户信息'
        verbose_name_plural = verbose_name
        ordering = ['-id']

    def __str__(self):
        return self.username
# users/forms.py

from django import forms
from .models import UserProfile

class ProfileForm(forms.ModelForm):
    '''从模型继承表单'''
    class Meta:
        model = UserProfile
        fields = ['nick_name', 'mobile', 'address']
创建自定义用户模型后, 需更改settings.py文件,指明使用的是自定义用户模型
AUTH_USER_MODEL = 'users.UserProfile'
创建视图并配置URLs
我们需要创建2个URLs和对应的视图来实现用户资料展示和用户资料编辑页面。
- 个人资料URLs
# users/urls.py

from django.conf.urls import url
from . import views

app_name = 'users'
urlpatterns = [
    url(r'^profile/$', views.profile, name='profile'),
    url(r'^profile/change/$', views.change_profile, name='change_profile'),
]
- 展示个人资料视图
from django.shortcuts import render, redirect
from django.contrib.auth.decorators import login_required
from django.contrib import messages

from .models import UserProfile
from .forms import ProfileForm


@login_required
def profile(request):
    '''展示个人资料'''
    user = request.user
    return render(request, 'users/profile.html', {'user':user})
- 更新个人资料视图
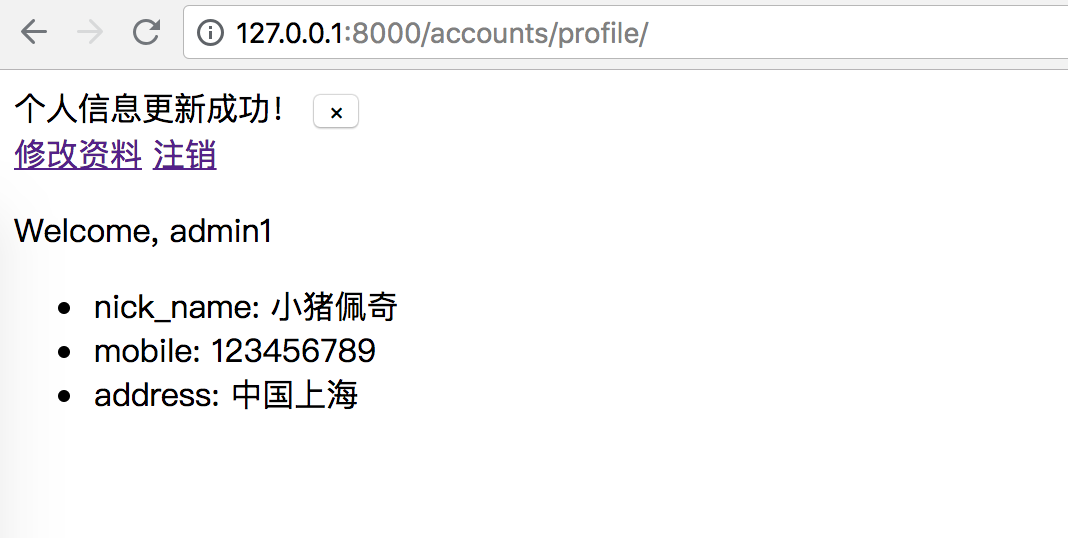
# users/views.py

from django.shortcuts import render, redirect
from django.contrib.auth.decorators import login_required
from django.contrib import messages

from .models import UserProfile
from .forms import ProfileForm

@login_required
def change_profile(request):
    '''更新个人资料'''
    if request.method == 'POST':
        # instance参数表示用model实例来初始化表单,这样就可以达到通过表单来更新数据
        form = ProfileForm(request.POST, instance=request.user)
        if form.is_valid():
            form.save()
            # 添加一条信息,表单验证成功就重定向到个人信息页面
            messages.add_message(request, messages.SUCCESS, '个人信息更新成功!')
            return redirect('users:profile')
    else:
        # 不是POST请求就返回空表单
        form = ProfileForm(instance=request.user)

    return render(request, 'users/change_profile.html', context={'form': form})
创建模板文件
- 展示个人资料模板文件
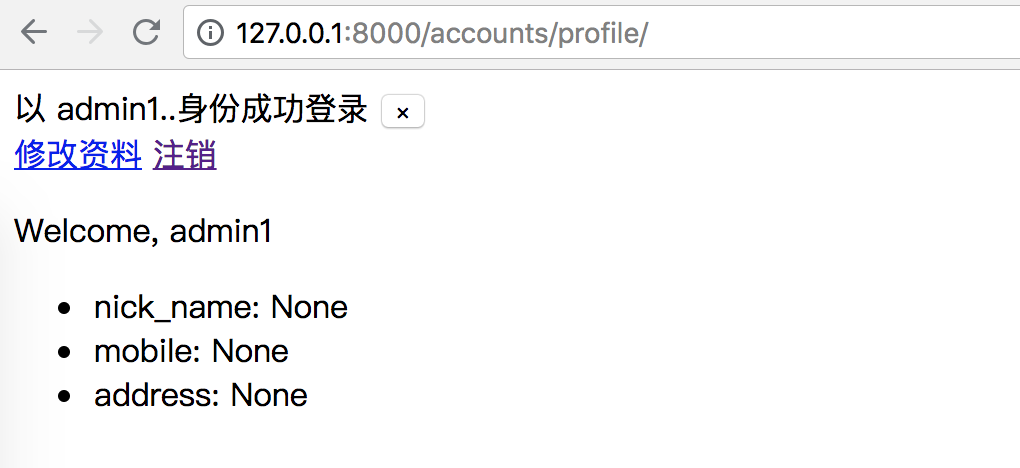
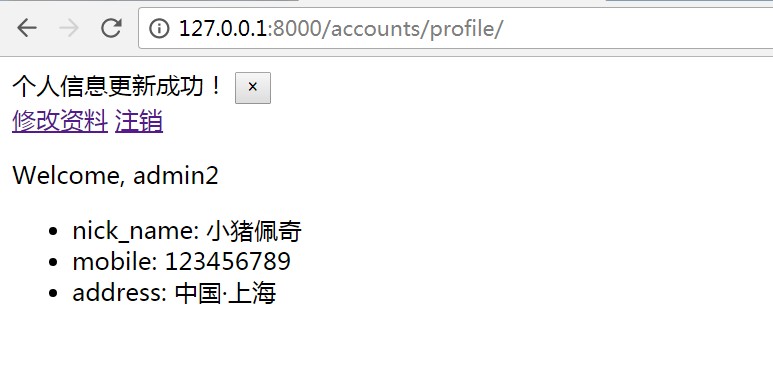
# users/templates/users/profile.html <!DOCTYPE html> <html lang="en"> <head> <meta charset="UTF-8"> <title>个人资料</title> </head> <body> <!--消息块--> {% if messages %} <div class="container"> {% for message in messages %} <div class="alert {% if message.tags %}alert-{{ message.tags }}{% else %}alert-secondary{% endif %} alert-dismissible rounded-0 fade show" role="alert"> {{ message }} <button type="button" class="close" data-dismiss="alert" aria-label="Close"> <span aria-hidden="true">×</span> </button> </div> {% endfor %} </div> {% endif %} {% if user.is_authenticated %} <a href="{% url 'users:change_profile' %}">修改资料</a> <a href="{% url 'account_logout' %}">注销</a> {% endif %} <p>Welcome, {{ user.username }}</p> <ul> <li>nick_name: {{ user.nick_name }}</li> <li>mobile: {{ user.mobile }}</li> <li>address: {{ user.address }}</li> </ul> </body> </html>
由于修改个人资料需要处理表单, 我们可以安装 django-crispy-forms 插件来处理(美化)表单
# 安装
pip install django-crispy-forms

# 加入 INSTALLED_APPS
INSTALLED_APPS = [
    ...,
    'allauth.socialaccount.providers.weibo',
    'allauth.socialaccount.providers.github',

    'crispy_forms',  # bootstrap 表单样式
]

# 配置表单插件使用的样式
CRISPY_TEMPLATE_PACK = 'bootstrap4'
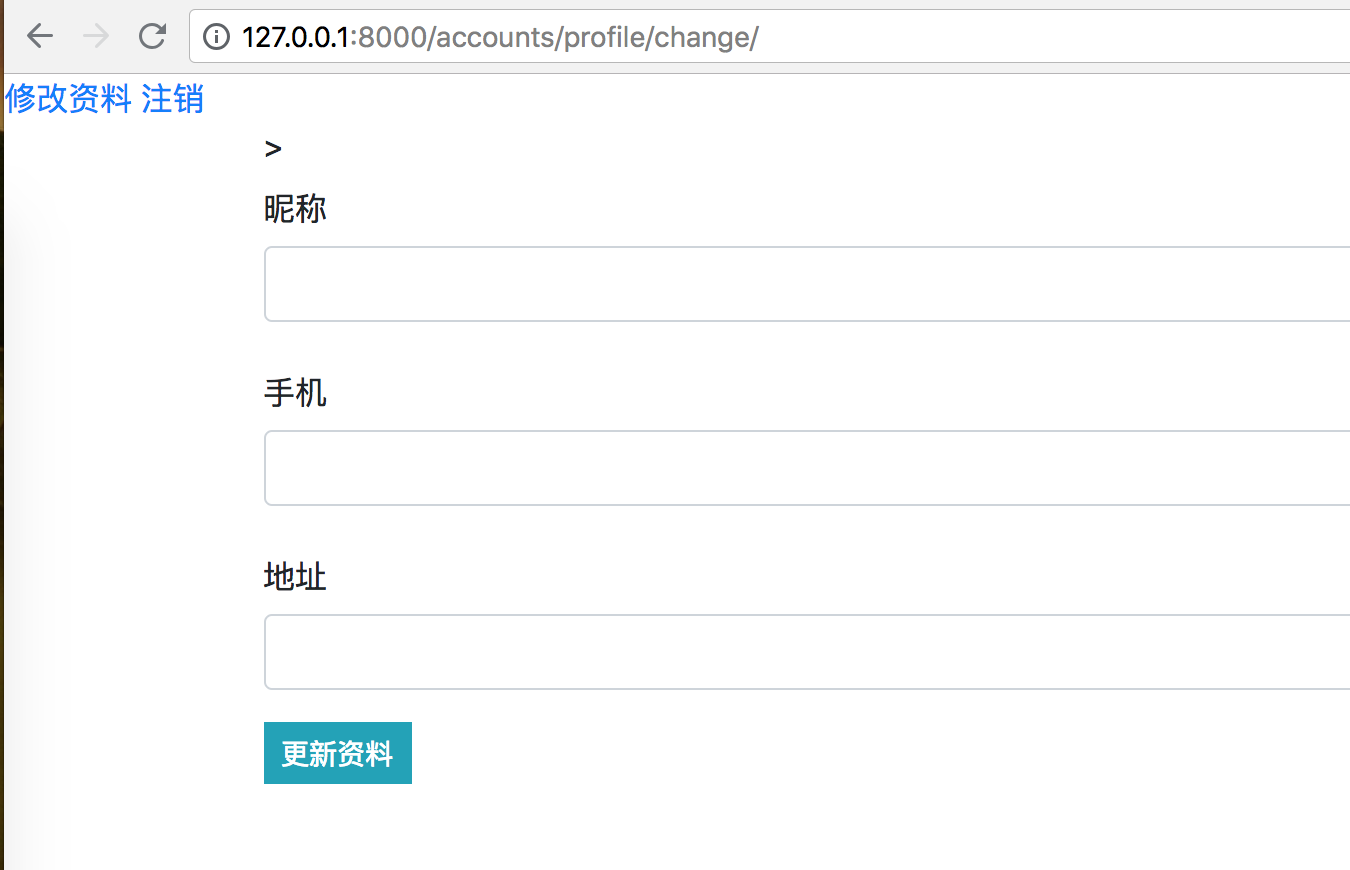
- 更新个人资料模板文件
# users/templates/users/change_profile.html {% load crispy_forms_tags %} <!DOCTYPE html> <html lang="en"> <head> <meta charset="UTF-8"> <title>修改资料</title> <link rel="stylesheet" href="https://cdn.bootcss.com/bootstrap/4.0.0-beta.2/css/bootstrap.min.css" integrity="sha384-PsH8R72JQ3SOdhVi3uxftmaW6Vc51MKb0q5P2rRUpPvrszuE4W1povHYgTpBfshb" crossorigin="anonymous"> </head> <body> <!--消息块--> {% if messages %} <div class="container"> {% for message in messages %} <div class="alert {% if message.tags %}alert-{{ message.tags }}{% else %}alert-secondary{% endif %} alert-dismissible rounded-0 fade show" role="alert"> {{ message }} <button type="button" class="close" data-dismiss="alert" aria-label="Close"> <span aria-hidden="true">×</span> </button> </div> {% endfor %} </div> {% endif %} {% if user.is_authenticated %} <a href="{% url 'users:change_profile' %}">修改资料</a> <a href="{% url 'account_logout' %}">注销</a> {% endif %} <div class="container"> <form method="post" enctype="multipart/form-data" action="{% url 'users:change_profile'%}">> {% csrf_token %} {{ form|crispy }} <button class="btn btn-info btn-sm rounded-0" type="submit">更新资料</button> </form> </div> </body> </html>
生成数据库
由于数据库已存在默认的用户表,使用自定义用户表进行migrate时, 应将数据库重置为初始状态,初始化成功后, 自定义用户表将会覆盖默认的用户表。
python manage.py makemigrations
python manage.py migrate
页面访问
python manage.py runserver
- 注册并激活用户
- 登录(根据LOGIN_REDIRECT_URL设置,登录成功后跳转到"/accounts/profile"页面)
- 修改资料
- 更新资料后,重新访问个人资料页面
代码优化
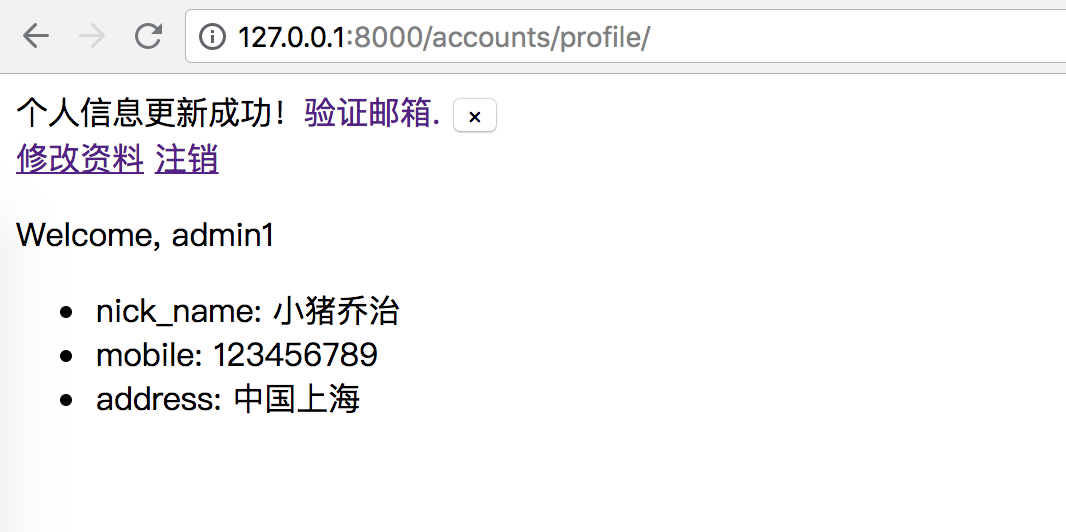
- 提示用户邮箱未通过验证 当用户设置 ACCOUNT_EMAIL_VERIFICATION='none',表示用户不需要进行邮箱验证也可以进行登录,这时候,我们可以为用户添加一条提示信息(如邮箱未验证),提醒用户进行邮箱验证。
# users/models.py 定义 "邮箱验证" 方法

from django.db import models
from django.contrib.auth.models import AbstractUser
from allauth.account.models import EmailAddress


class UserProfile(AbstractUser):
    ...,

    def email_verified(self):
        if self.is_authenticated:
            result = EmailAddress.objects.filter(email=self.email)
            if len(result):
                return result[0].verified
        else:
            return False
# 直接在数据中修改 "account_emailaddress.verified=0",表示邮箱未验证

SQL> update account_emailaddress t set t.verified = 0;
# 修改 settings.py 文件 ACCOUNT_EMAIL_VERIFICATION = 'none',表示邮箱未验证,也可以登录

ACCOUNT_EMAIL_VERIFICATION = 'none'
# users/templates/users/profile.html 添加消息(验证邮箱) <!--消息块--> {% if messages %} <div class="container"> {% for message in messages %} <div class="alert {% if message.tags %}alert-{{ message.tags }}{% else %}alert-secondary{% endif %} alert-dismissible rounded-0 fade show" role="alert"> {{ message }} {% if not user.email_verified %} <a href="{% url 'account_email' %}" style="text-decoration:none">验证邮箱.</a> {% endif %} <button type="button" class="close" data-dismiss="alert" aria-label="Close"> <span aria-hidden="true">×</span> </button> </div> {% endfor %} </div> {% endif %}
用户未验证邮箱(显示"验证邮箱")
用户已验证邮箱(不会显示"验证邮箱")
 注: 邮箱验证消息提示,可以只显示在用户登录成功后页面。
- 修改个人资料(如手机)添加校验规则 在修改个人资料的时候,我们并未对手机号进行正则校验,用户随便输入一个手机号都可以进行修改,我们可以对表单添加校验规则来规范用户的输入。
第三方 auth 登录
github 账号
- 将第三方服务商 providers.github 加入到 settings.py 配置文件的 INSTALLED_APP 中
INSTALLED_APPS = [
    ...,
    'allauth.socialaccount.providers.github',
]
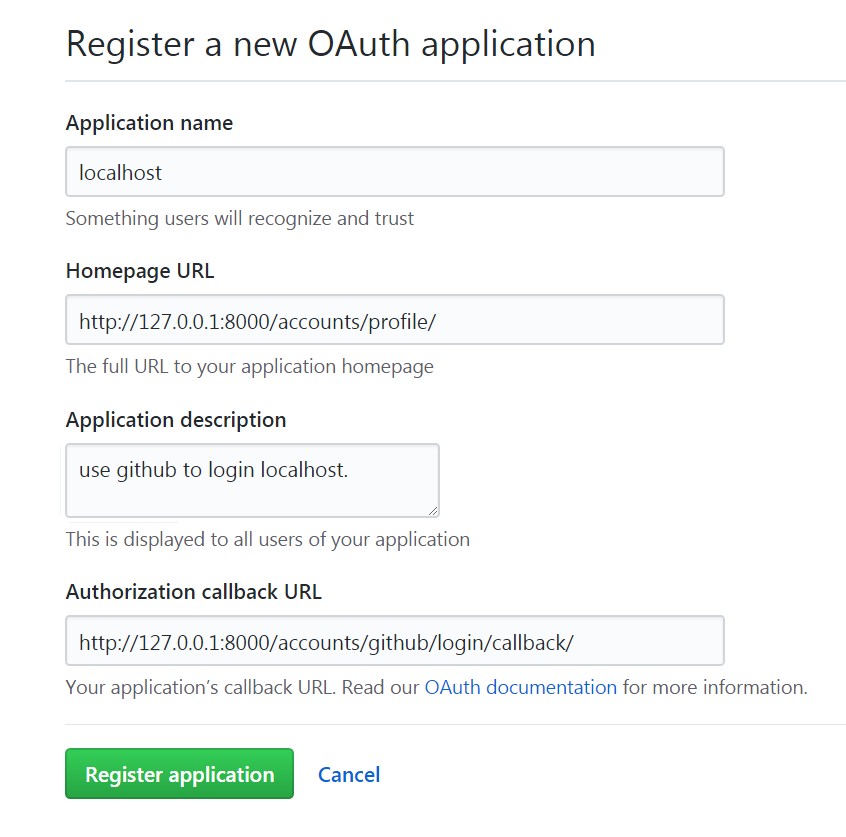
- 在github上申请一个OAuth App("settings" -> "Developer settings" -> "Register a new application")
Github OAuth注册页面
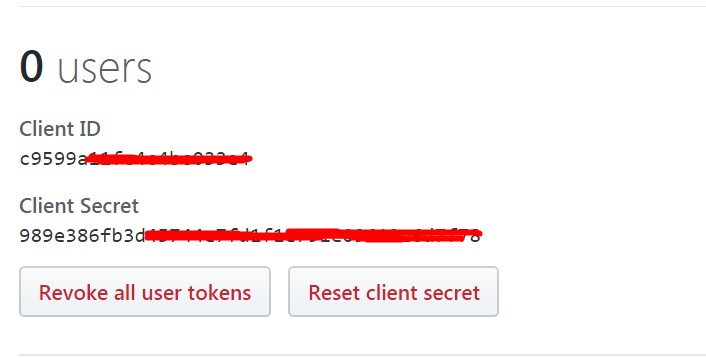
- 申请完成 Oauth app 后,会得到 Client ID 和 Client Secret
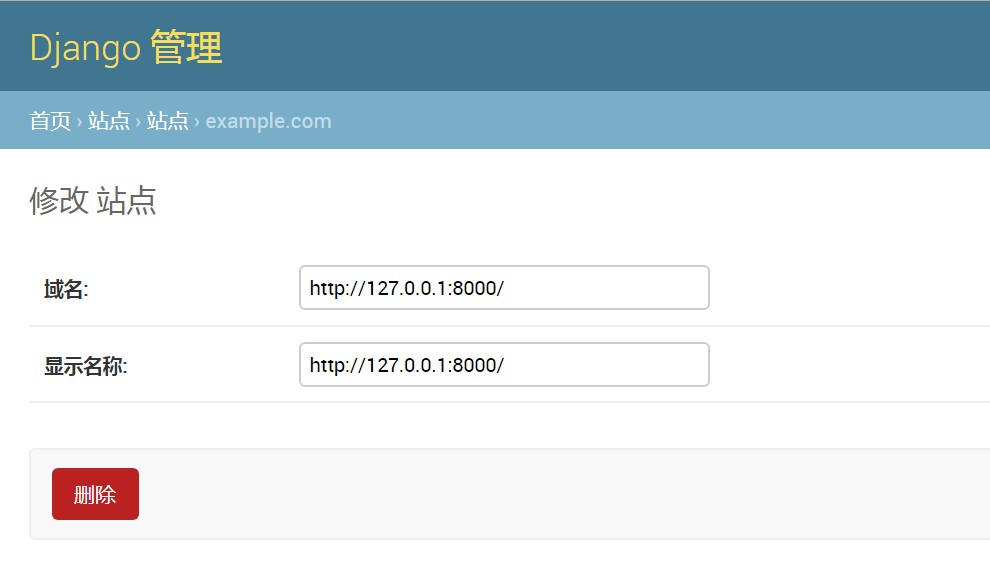
- 点开站点管理,将example.com改为我们博客的域名,在开发环境下,我们用 http://127.0.0.1:8000/
- 在 admin后台管理页面 点击 SOCIAL ACCOUNTS 下的 Social application,增加一个 application
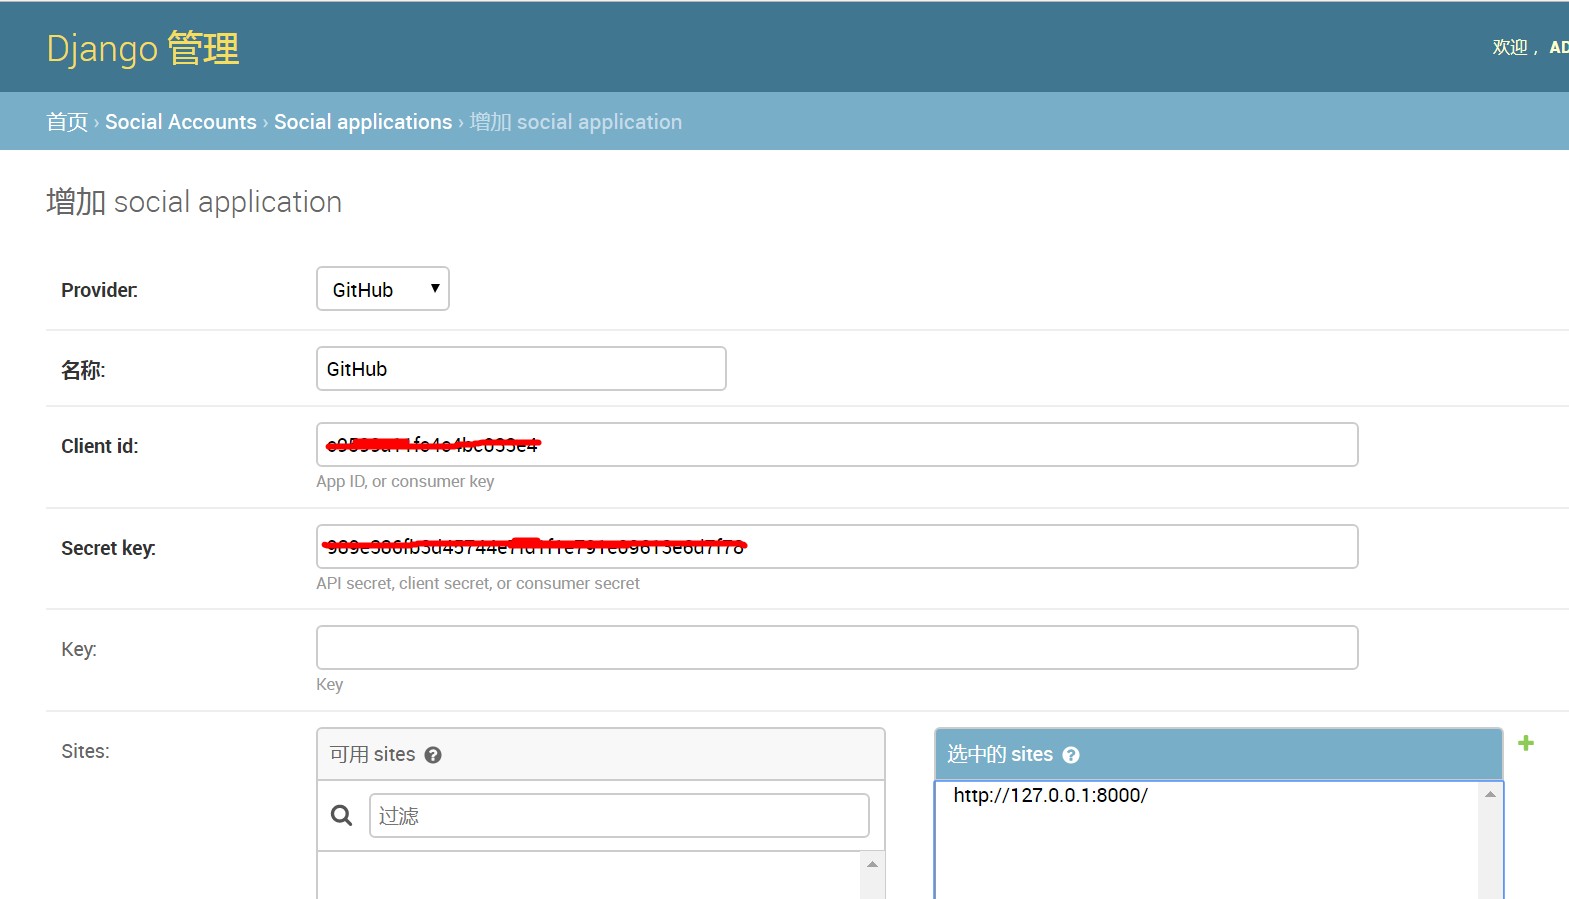
- 使用 GitHub 登录
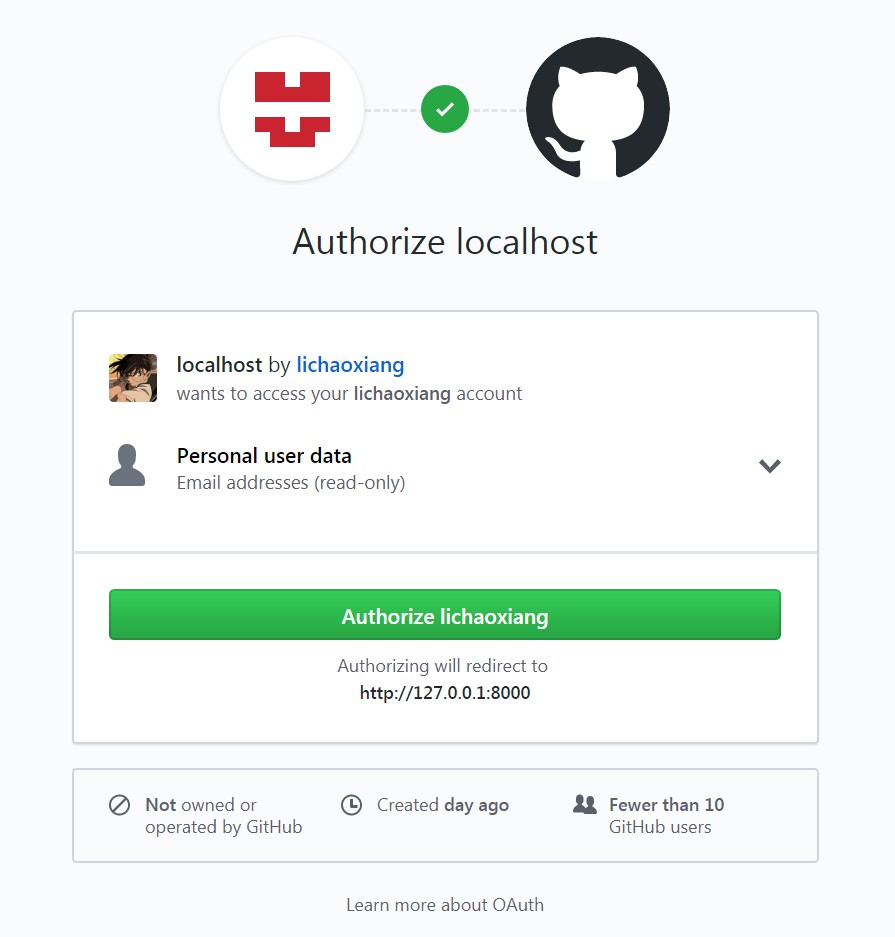
-
登录成功
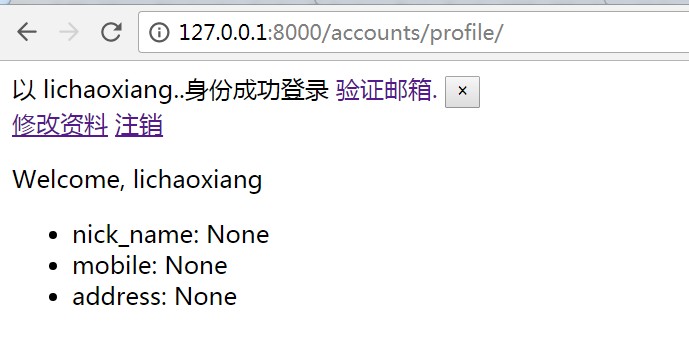
-
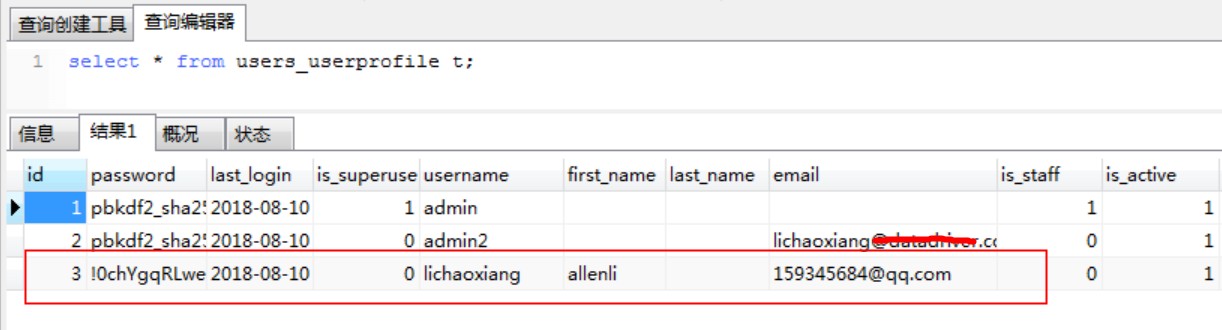
使用GitHub作为第三方登录,关联成功后,不需要设置邮箱和用户名,数据库会记录邮箱和用户名
baidu 账号
- 将第三方服务商 providers.github 加入到 settings.py 配置文件的 INSTALLED_APP 中
INSTALLED_APPS = [
    ...,
    'allauth.socialaccount.providers.github',
]
- 获取 Baidu 的 API Key 和 Secret Key
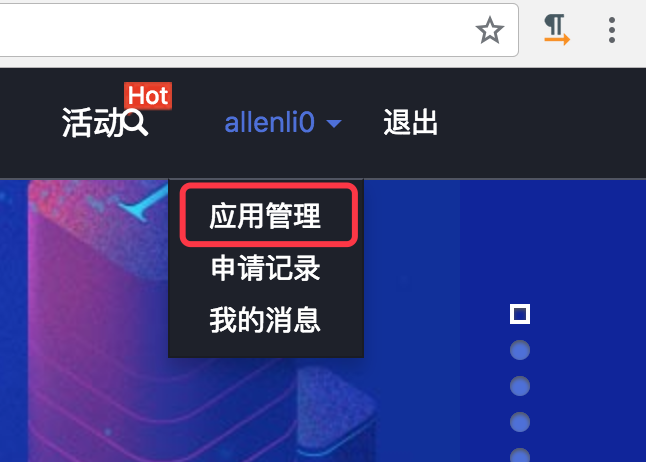
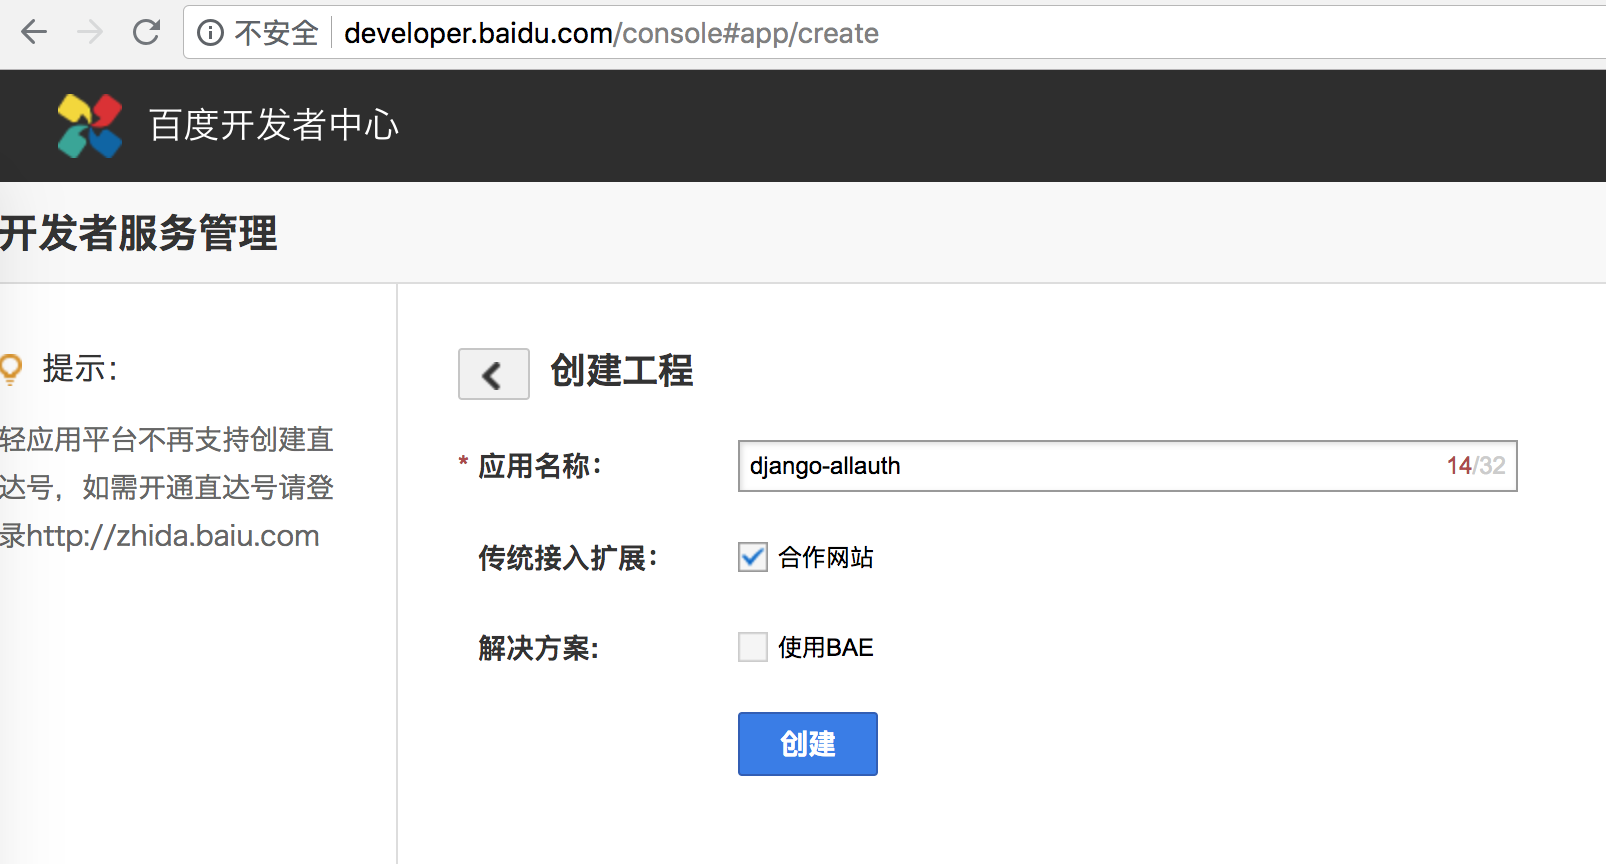
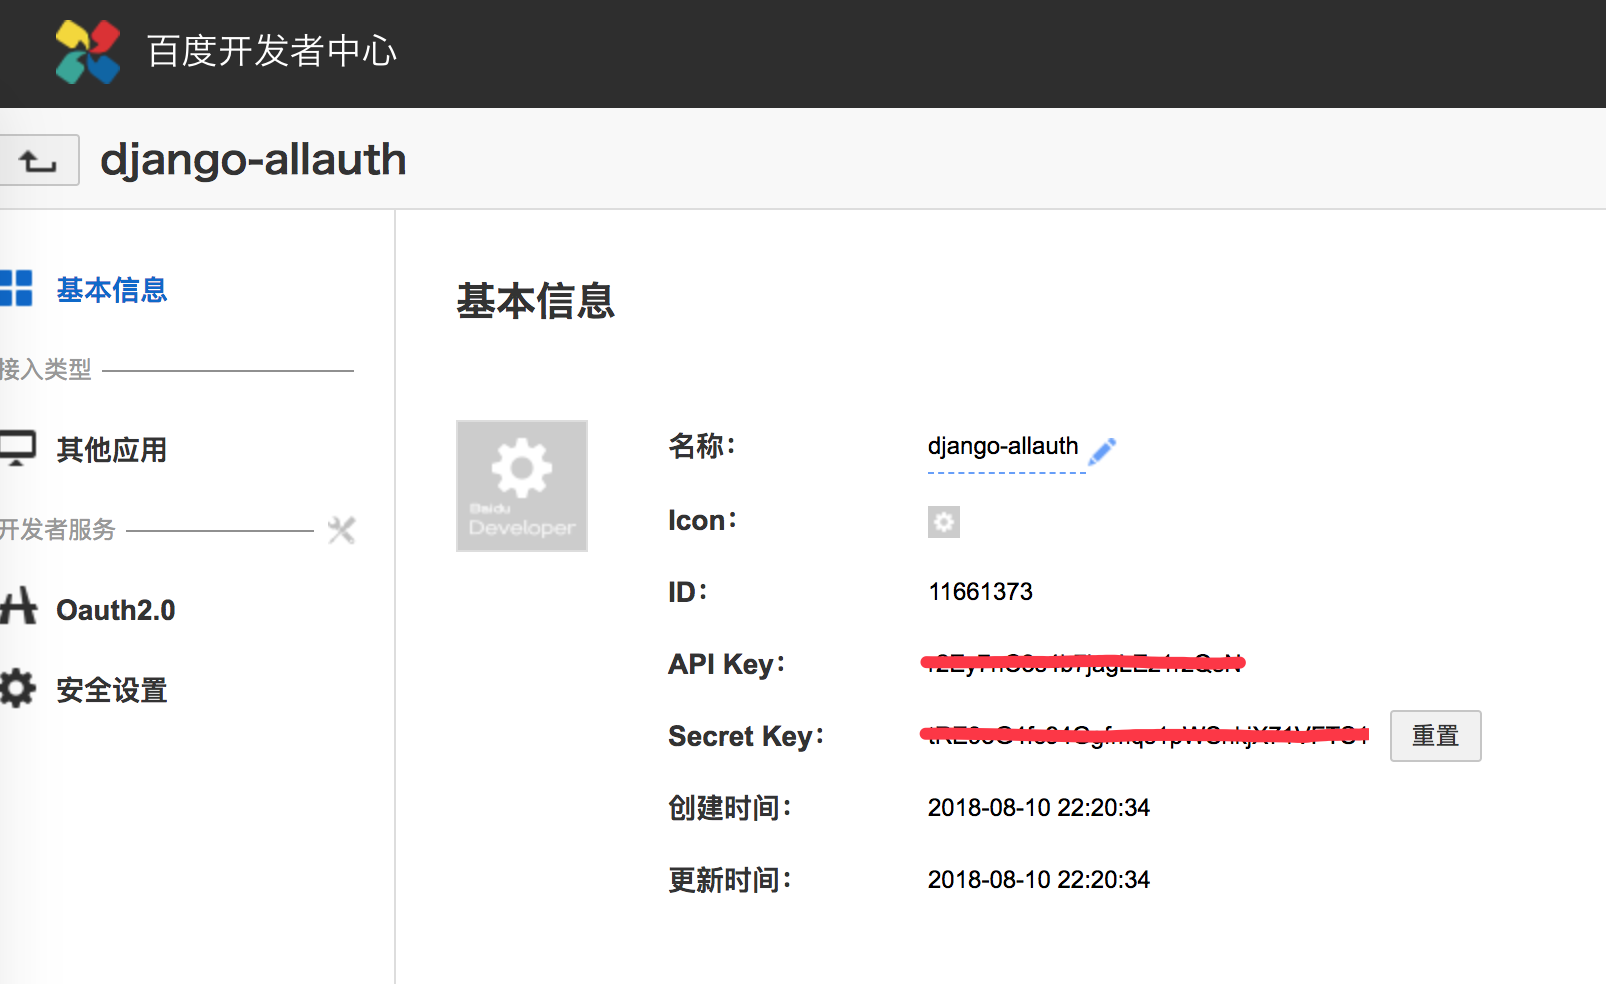
登录百度开发者中心 http://developer.baidu.com/,创建一个项目,百度会自动给你分配 API Key 和 Secret Key
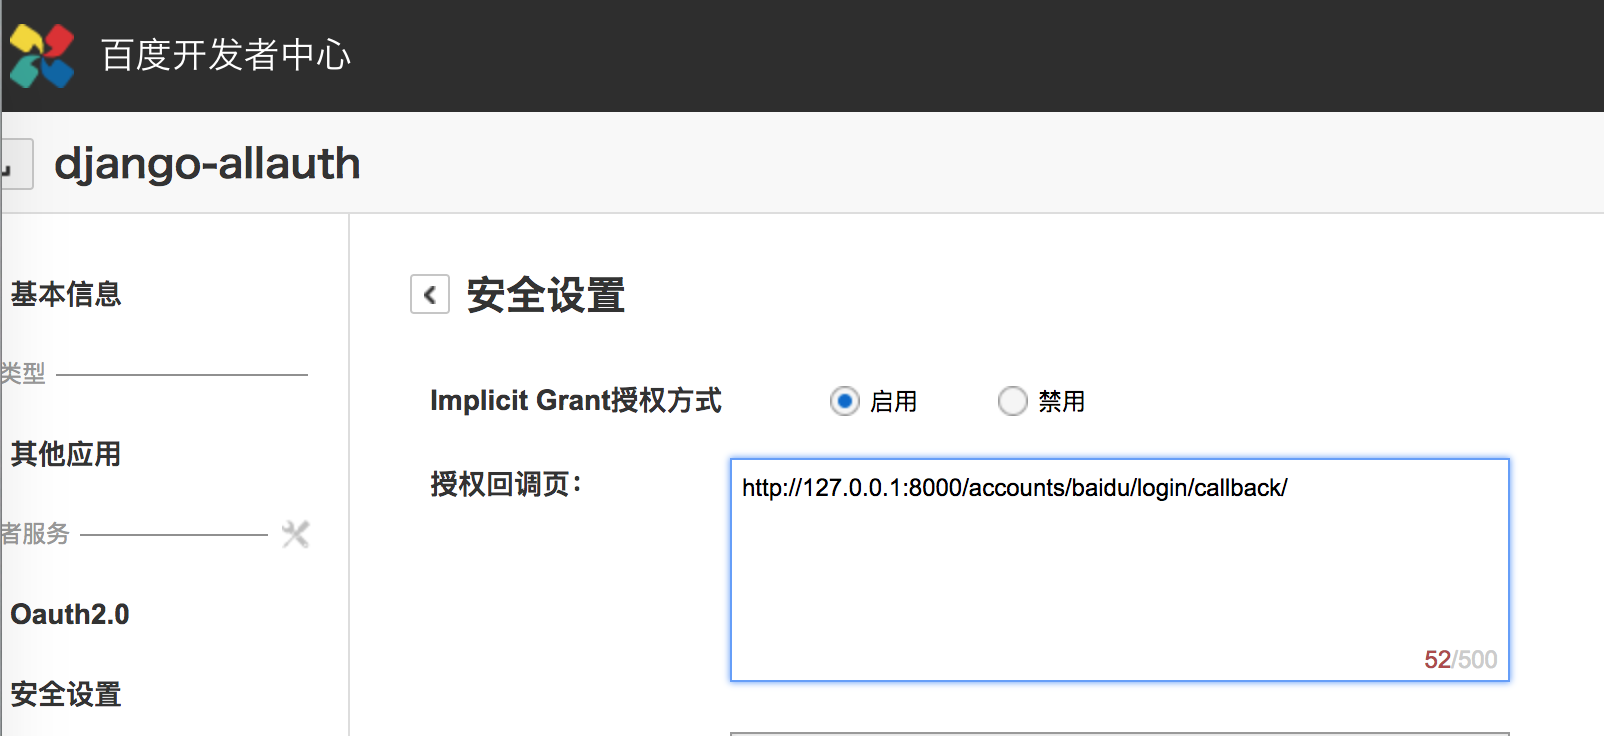
- 应用创建好之后,还需要点击 "安全设置",设置回调URL,这样当百度授权登录完成后,可以跳转回自己的网站(回调的URL地址为: http://127.0.0.1:8000/accounts/baidu/login/callback/)
- 在 admin后台管理页面 点击 SOCIAL ACCOUNTS 下的 Social application,增加一个 application
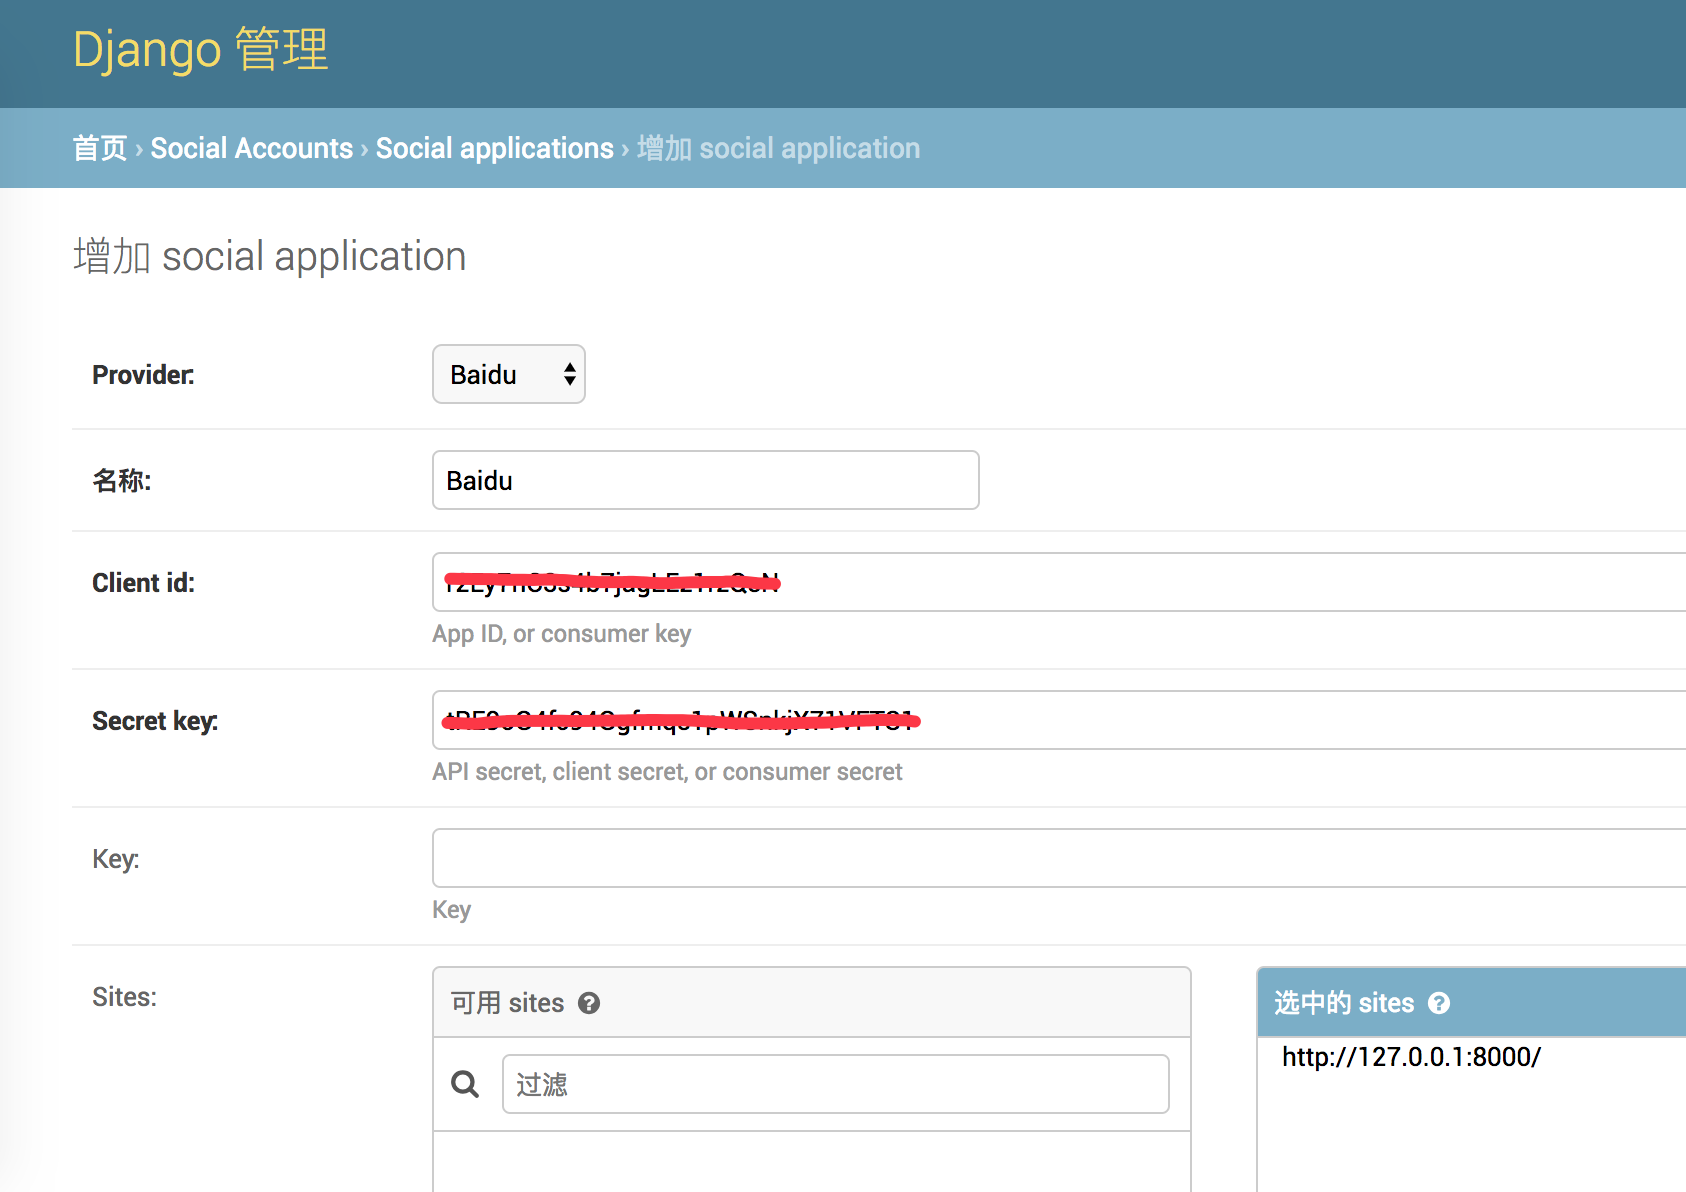 注: 在开发环境中请确保 "sites" 的 "domain.name" 已经设置为 "127.0.0.1",而生产环境中, 可以设置为自己的域名。
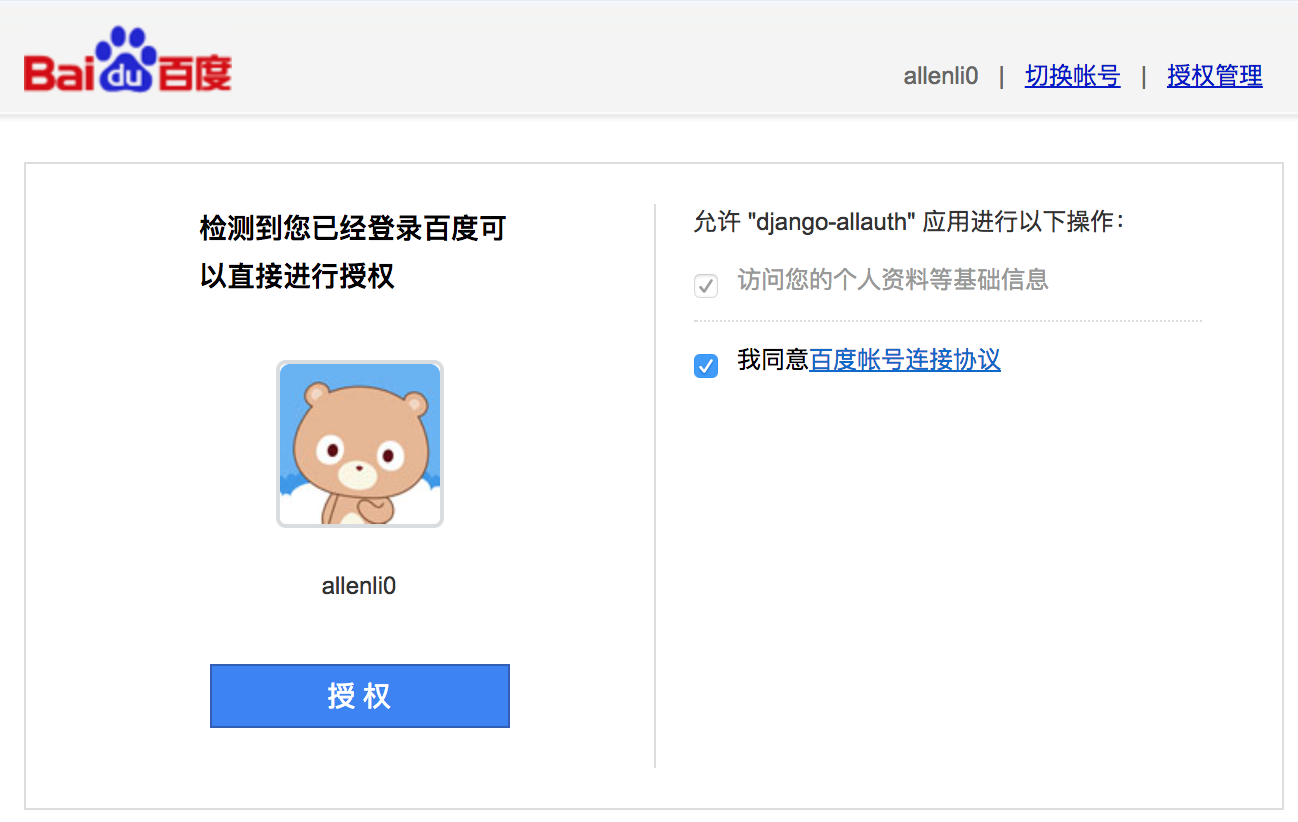
- 使用 Baidu 登录
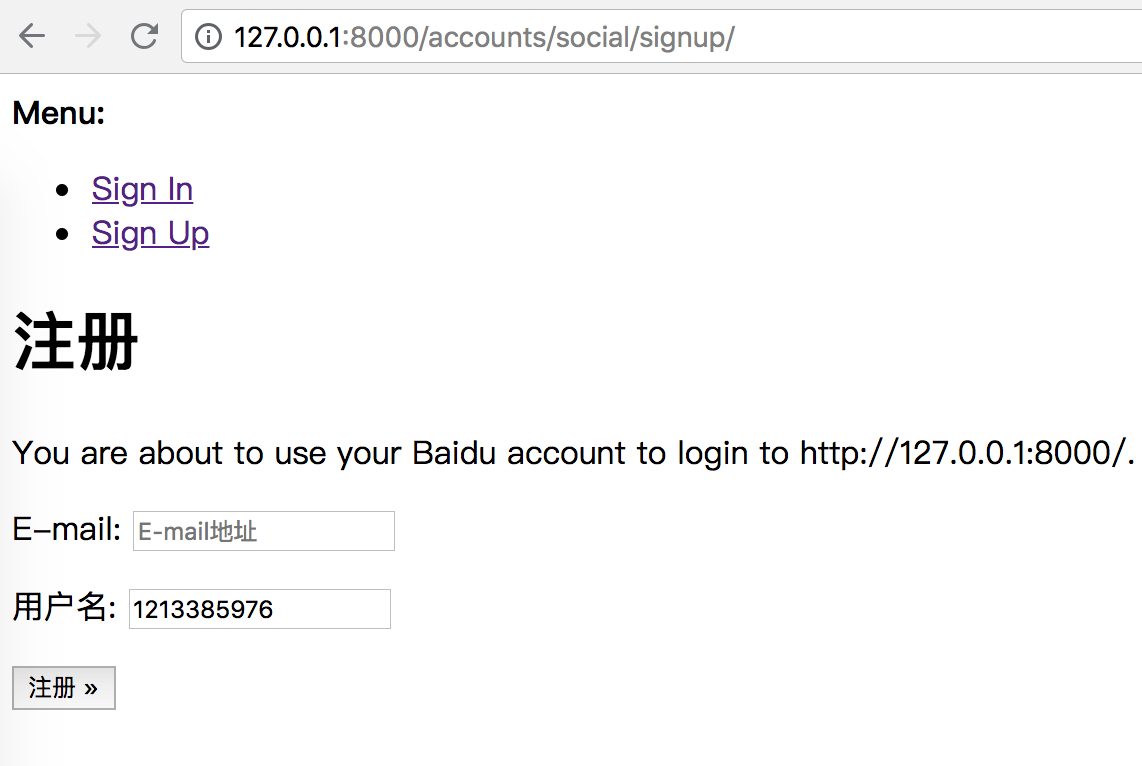
- 使用 Baidu 作为第三方登录,关联成功后,还需要设置邮箱和用户名
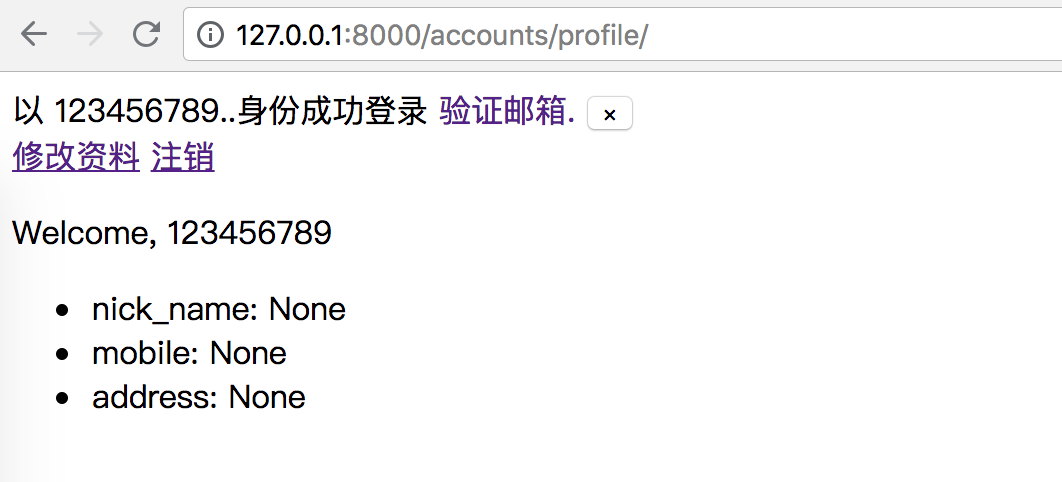
- 登录成功
美化表单
django-allauth 自带的模板是没有经过美化的,另外涉及到邮箱验证和各种消息也是固定的,所以我们就需要进行模板的美化以及邮箱验证和消息文本的修改。
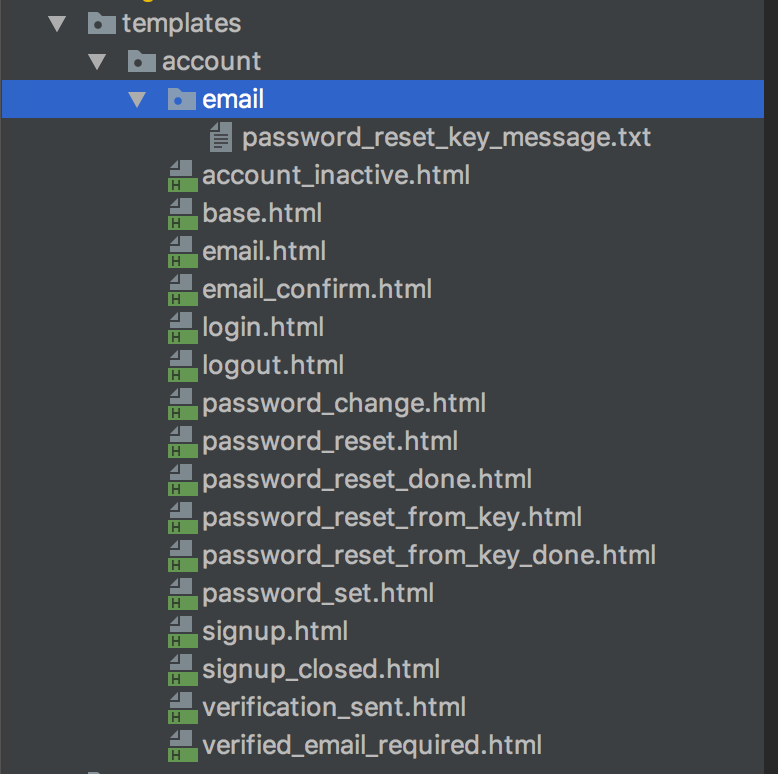
- 下载 django-allauth 模板和邮件文本文件
我们可以从 github 上将 django-allauth 的 /templates/account 文件夹拷贝至本地应用中(下载地址: https://github.com/pennersr/django-allauth/tree/master/allauth)
- 创建css文件,用于修改样式
# users/static/users/css/account.css

.secondaryAction {
    color: #868e96;
}
.secondaryAction:hover {
    text-decoration: none;
    color: #007bff;
}
.asteriskField {
    margin-left: .25rem;
    color: #dc3545;
}
#social-login .login-title {
    position: relative;
    display: block;
    margin-bottom:10px;
}
#social-login span {
    color:#999;
}
#social-login span:before,
#social-login span:after {
    position: absolute;
    top: 50%;
    background: #eee;
    width: 38%;
    height: 1px;
    content: '';
}
#social-login span:before {
    left:0;
}
#social-login span:after {
    right:0;
}
.fa-weibo {
    color: #e12f11;
    opacity: .8;
}
.fa-github {
    color: #333;
    opacity: .8;
}
.fa-weibo:hover,
.fa-github:hover {
    opacity: 1;
}
.btn-sm {
    padding:.2rem .7rem;
}
.change_profile .form-control,
.card-login .form-control {
    border-radius: 0;
}
.change_profile .alert,
.card-login .alert {
    border-radius: 0;
}
.change_profile .alert li,
.card-login .alert li {
    margin-bottom: .5rem;
}
.change_profile .alert ul,
.card-login .alert ul {
    padding-left:.5rem;
    margin-bottom: 0;
}
#profile-avatar .avatar {
    width:80px;
    padding: .25rem;
    background-color: #fff;
    border: 1px solid #dee2e6;
    border-radius: .25rem;
}
- 在 settings.py 文件中配置模板文件位置
TEMPLATES = [
    {
        ...,
        'DIRS': [os.path.join(BASE_DIR, 'templates')],  # 模板文件
        'APP_DIRS': True,
        ...,
    },
]
- 使用 bootstrap 美化表单,修改 base.html 使用 bootstrap 美化表单, 需要确认是否安装了 django-crispy-forms
# templates/account/base.html <!DOCTYPE html> <html lang="en"> <head> <meta charset="utf-8"> <meta name="description" content="用户账号管理,使用django-allauth社交用户系统,支持Baidu、Github等社交账号登录。"> <meta name="keywords" content="django-allauth,社交用户系统,OAuth 2.0"> <title>{% block head_title %}{% endblock %}</title> <link rel="stylesheet" href="https://cdn.bootcss.com/bootstrap/4.0.0-beta.2/css/bootstrap.min.css" integrity="sha384-PsH8R72JQ3SOdhVi3uxftmaW6Vc51MKb0q5P2rRUpPvrszuE4W1povHYgTpBfshb" crossorigin="anonymous"> <link href="https://netdna.bootstrapcdn.com/font-awesome/4.7.0/css/font-awesome.min.css" rel="stylesheet"> <link href="../../users/static/users/css/account.css" rel="stylesheet"> </head> <body> {% block message %} {% if messages %} <div class="container"> {% for message in messages %} <div class="alert {% if message.tags %}alert-{{ message.tags }}{% else %}alert-secondary{% endif %} alert-dismissible rounded-0 fade show" role="alert"> {{ message }} <button type="button" class="close" data-dismiss="alert" aria-label="Close"> <span aria-hidden="true">×</span> </button> </div> {% endfor %} </div> {% endif %} {% endblock %} {% block base_content %} <div class="container"> <div class="row"> <div class="col-12 col-sm-8 col-md-6 offset-sm-2 offset-md-3 px-xl-5"> <div class="card rounded-0 px-3 px-lg-4"> <div class="card-header text-center bg-white py-2"> <h3 class="my-1 text-info">{% block user_title %}账号管理{% endblock %}</h3> </div> <div class="card-body card-login">{% block content %}{% endblock %}</div> <div class="text-center mb-5" id="social-login"> <div class="login-title"> <span>快速登录</span> </div> <div class="login-link"> <a class="mx-4" href="/accounts/weibo/login/?next={{ next_url }}" title="社交账号登录有点慢,请耐心等候!"><i class="fa fa-weibo fa-2x"></i></a> <a class="mx-4" href="/accounts/github/login/?next={{ next_url }}" title="社交账号登录有点慢,请耐心等候!"><i class="fa fa-github fa-2x"></i></a> </div> </div> </div> </div> </div> </div> {% endblock %} {% block extra_body %} {% endblock %} </body> </html>
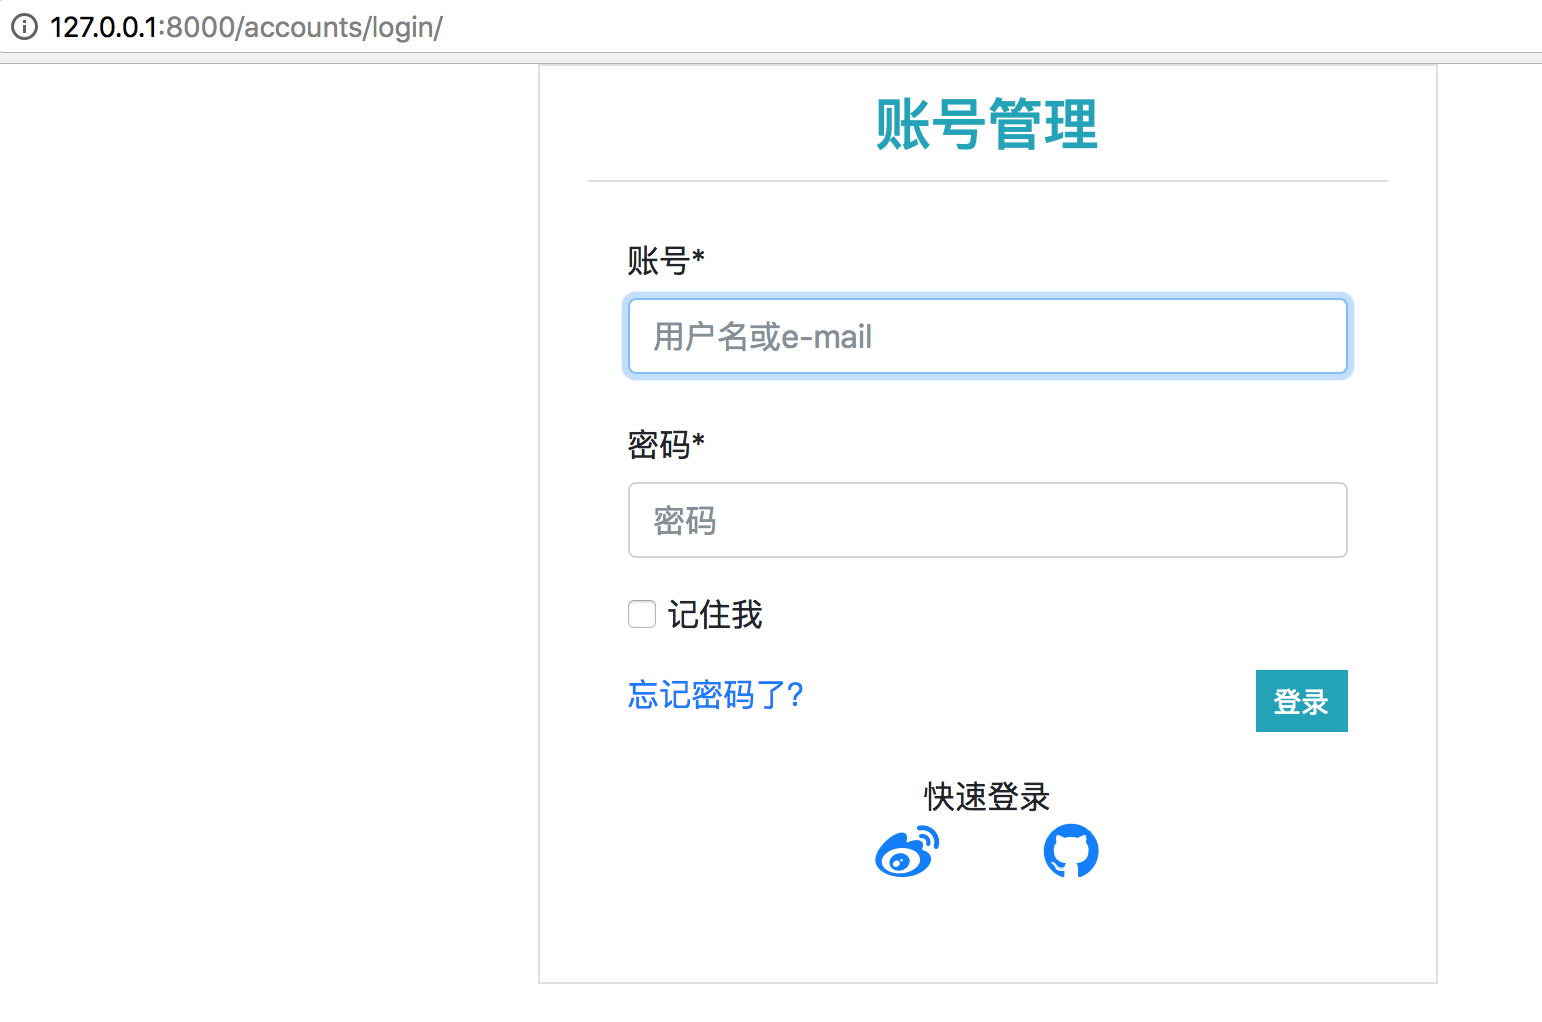
- 美化 login 登录页面
# templates/account/login.html

{% extends "account/base.html" %}

{% load i18n %}
{% load account socialaccount %}
{% load crispy_forms_tags %}

{% block head_title %}{% trans "Sign In" %}{% endblock %}

{% block content %}
<form class="login" method="POST" action="{% url 'account_login' %}">
    {% csrf_token %}
    {{ form|crispy }}
    {% if redirect_field_value %}
    <input type="hidden" name="{{ redirect_field_name }}" value="{{ redirect_field_value }}"/>
    {% endif %}
    <a class="secondaryAction" href="{% url 'account_reset_password' %}">{% trans "Forgot Password?" %}</a>
    <button class="pull-right btn btn-info btn-sm rounded-0" type="submit">{% trans "Sign In" %}</button>
</form>
{% endblock %}
参考资料
https://django-allauth.readthedocs.io/en/latest/
原创文章,转载请注明出处:http://www.opcoder.cn/article/2/